Blender tutorial: light - part 2
·
In this new post of the series Blender tutorial I will talk about about how to do other cool stuff with lights in Blender.
In the previous post of the series "Blender tutorial" we talked
about light in Blender. In this post we will continue to talk about lights in Blender.
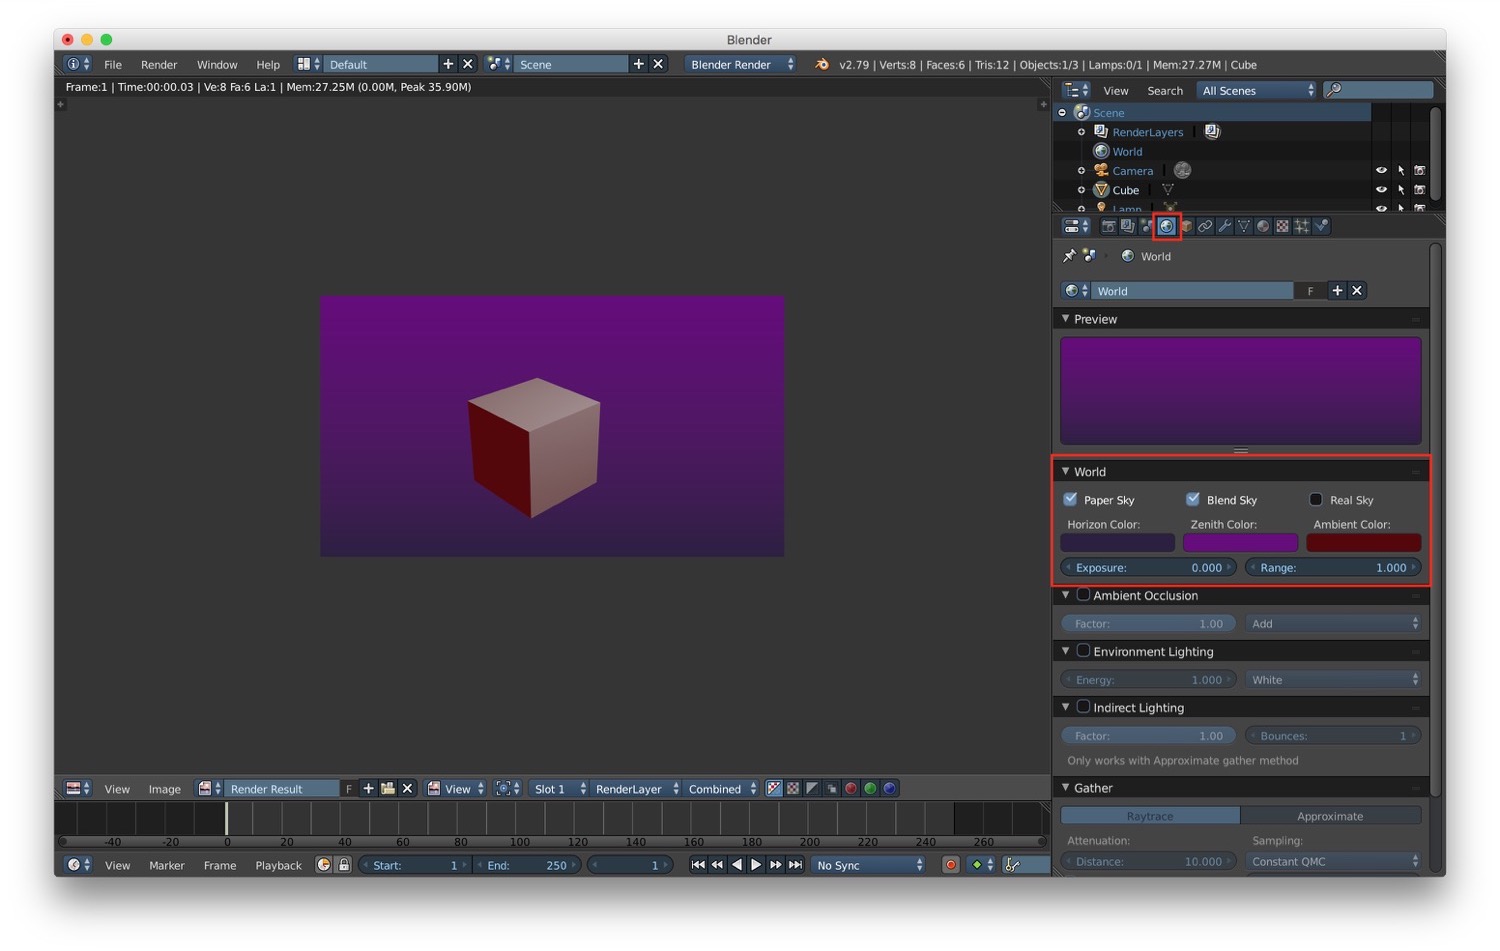
We will start by exploring how it is possible to add a light background and setup ambient light. We can setup these
options in the world property panel. Inside it we have a section "world" in which we can modify the background of our
scene. We have some option to customize the final background result:
- blend sky, if enabled blends the horizon and zenith sky
- paper sky, if enabled with blend sky it maps the background colors to a plane
- real sky, if enabled place the horizon color in the middle (as real sky)
In the same section there's also an ambient color property. The ambient color let us manage the overall light color.
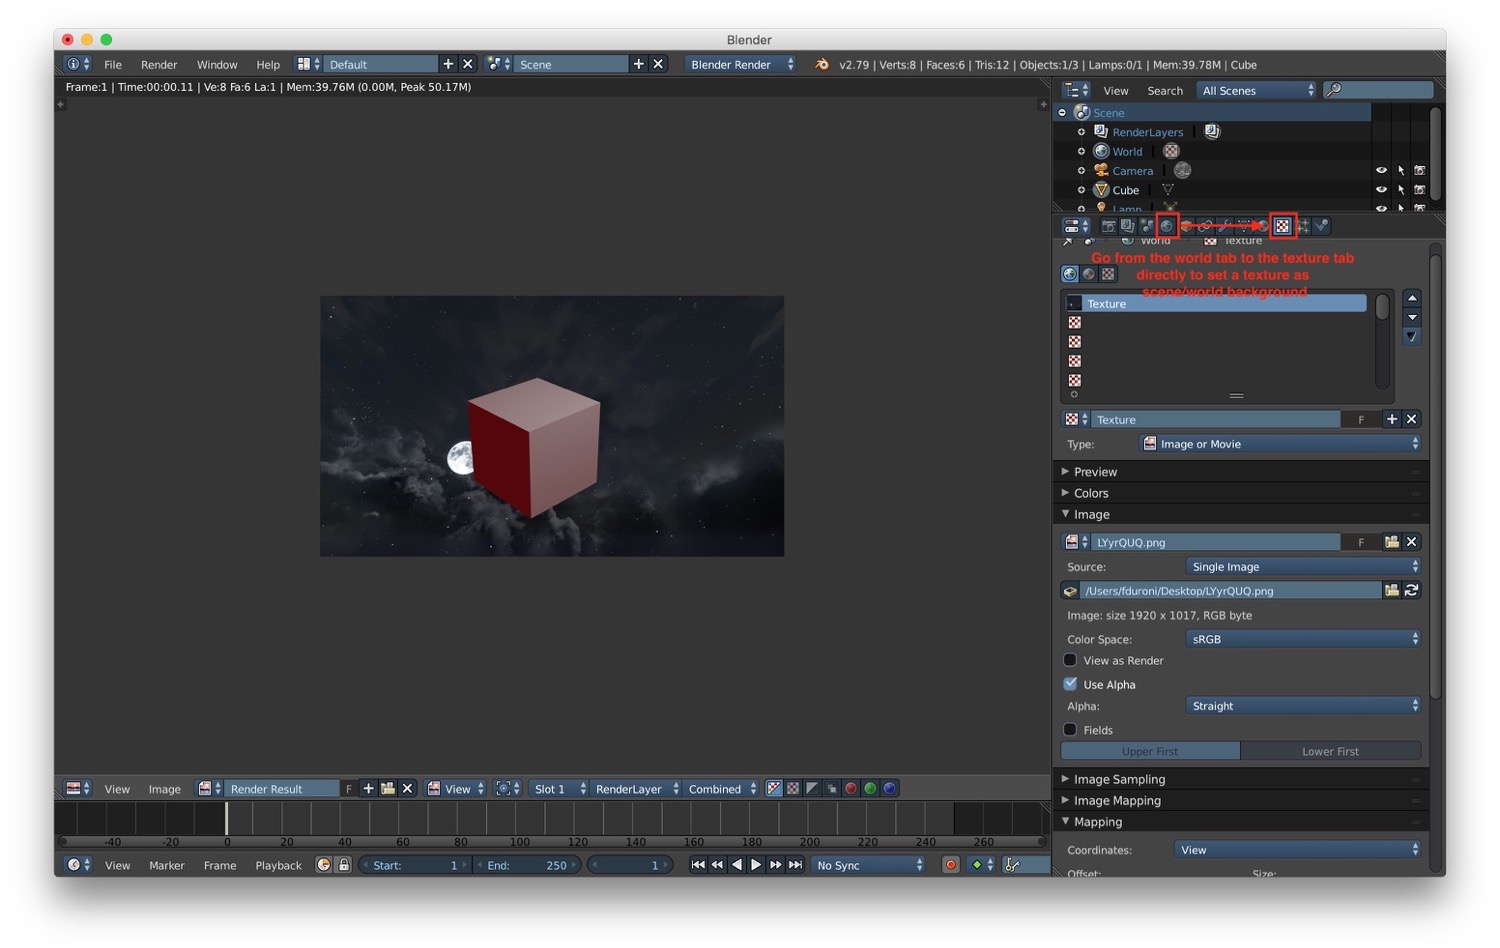
We can also choose to add a background image. To do that we have to go from the world tab directly to the texture tab. Blender will detect this operation and it will know that we are adding a texture to the background of our scene. From here we can choose the type of texture we want and we can apply it.
We also have a specific type of light to simulate the sun: the sun lamp. It behaves in a similar way to the Hemi lamp.
One particular feature it has is the possibility to add a sky as background and simulate a sun in terms of shape and
effects.
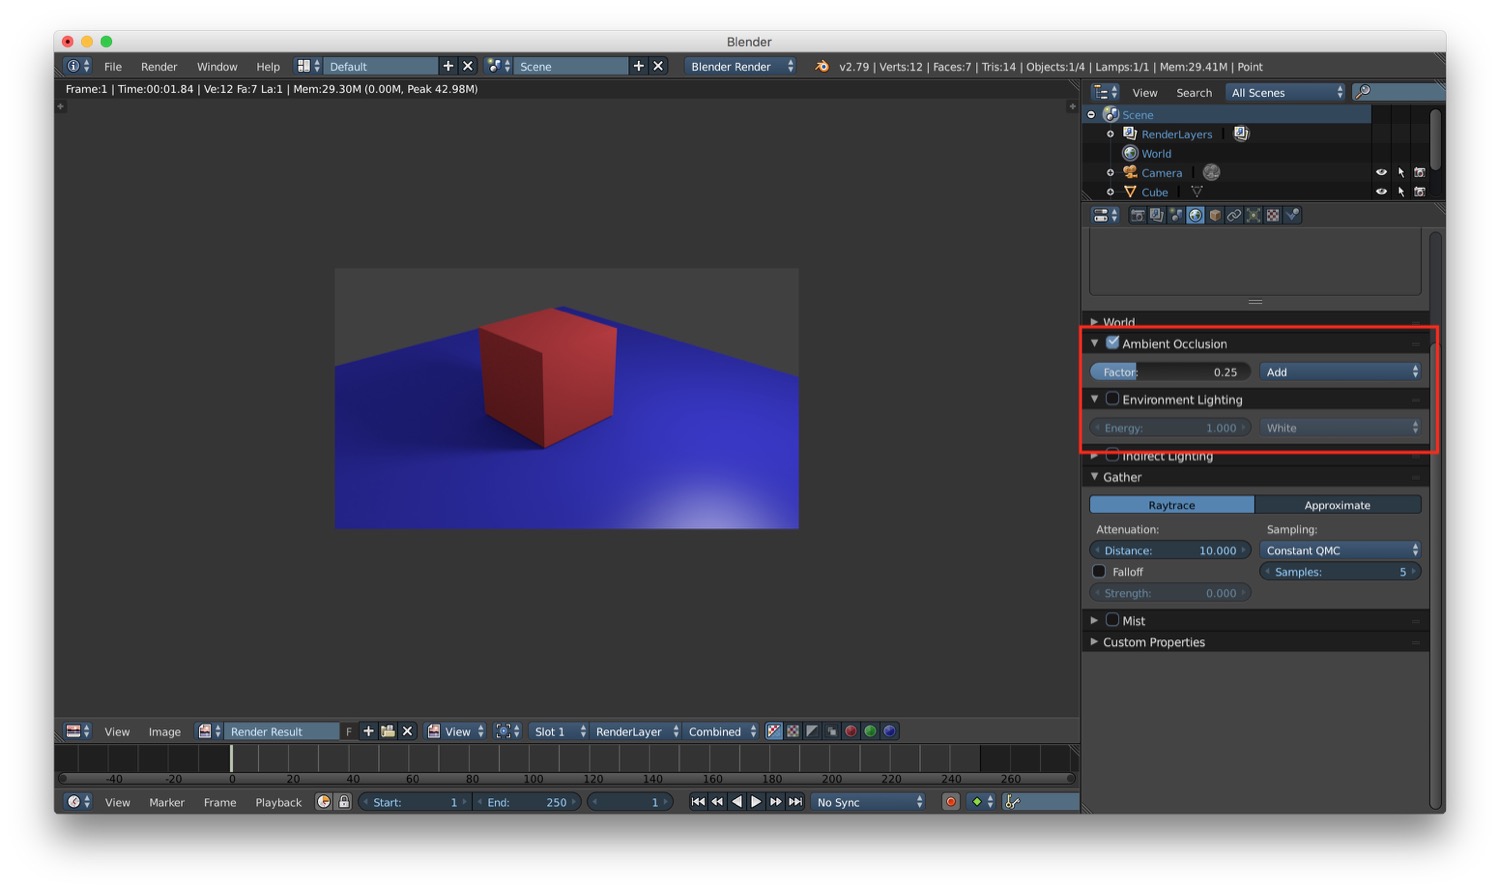
Last but not least we have ambient occlusion. It is a technique that let us simulate more accurately the ambient light
in a scene. We can activate it from the world tab in the properties panel. It is possible to adjust how much ambient
occlusion will influence the final rendering result by adjusting the factor property. Generally speaking, ambient
occlusion is really slow in terms of rendering. Is it possible to improve the rendering speed by changing the gather
options in the world panel to "approximate" and setup the number of passes that the renderer must use. Ambient occlusion
uses the ambient color by default. If we want to achieve a more accurate result, especially if our scene is an outdoor
one, we can activate the environment light. This kind of effect will generate ambient occlusion and eventually it will
use (if we choose it) the sky/sky texture as color.
In the next post about Blender we will talk about cameras and rendering.