
Blender tutorial: light - part 1
·
In this new post of the series Blender tutorial I will talk about light.
In the previous post of the series "Blender tutorial" we talked
about textures in Blender. In this post we will explore lights in Blender.
First of all we need to clarify one thing: lights in Blender are called lamps. So in all menus and option we will find
that word to identify lights.
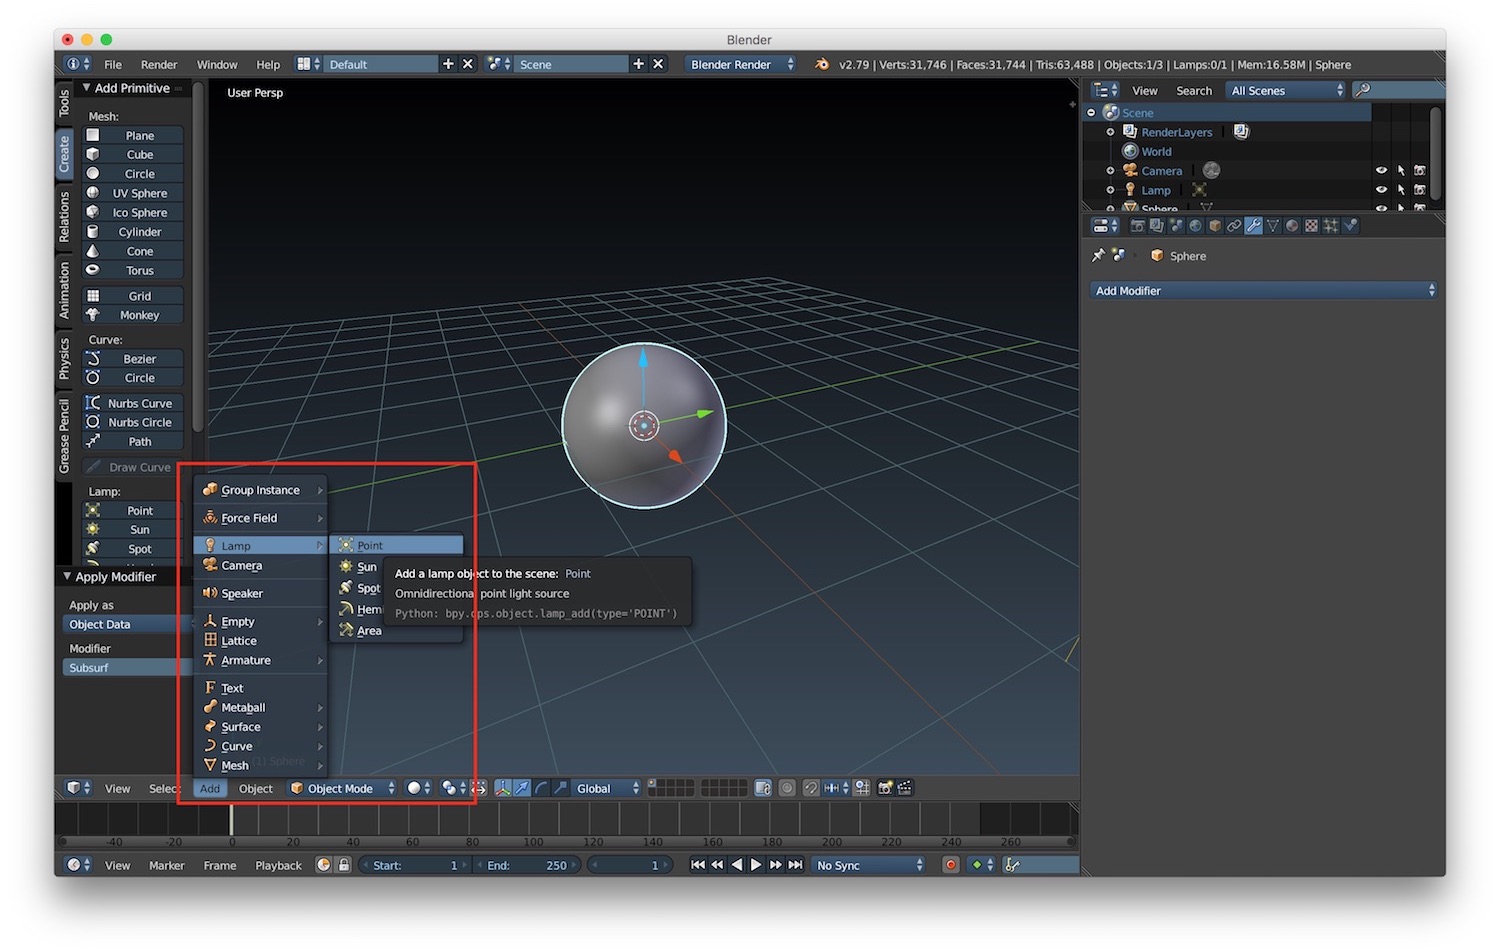
To add a light to our scenes, just use the option Add -> Lamp and select one of the light type available. Let's add for
example a simple point light.
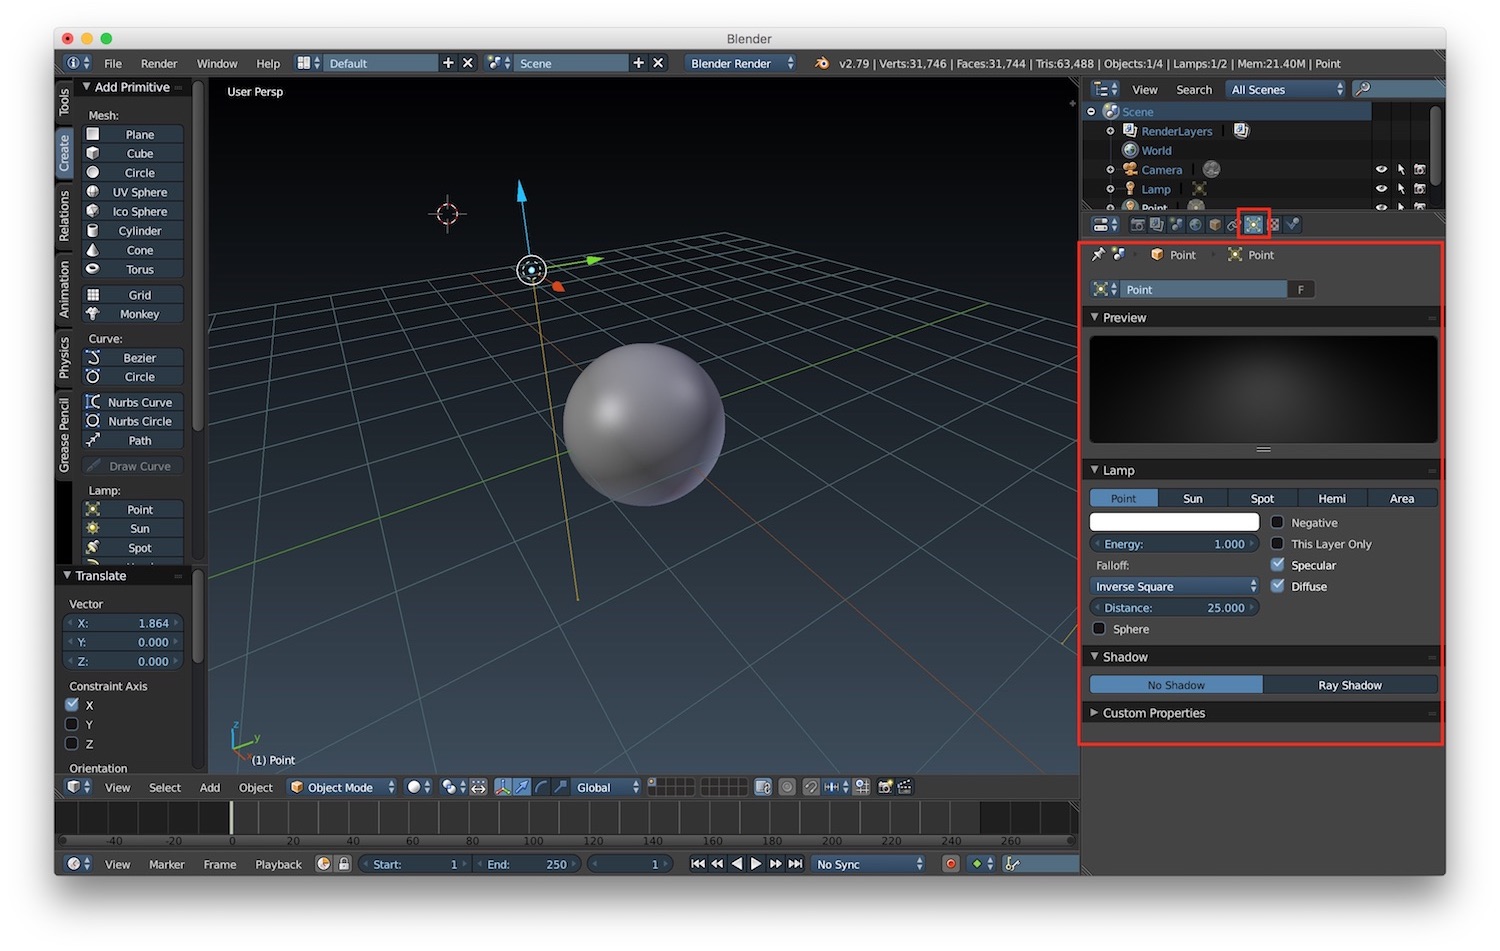
We can then customize the light properties using the related tab in the properties panel. In this section you can find specific customizable properties for each type of light. For example for a point light we can customize:
- the falloff of the light, so how the light decrease when you get away from it
- negative, to transform the light so that it will subtract illumination from the scene
- diffuse and specular, so that the light will be used to render only specular or diffuse component of a material
- energy, how much bright the light is
- distance, the maximum light distance at which it will still affect objects
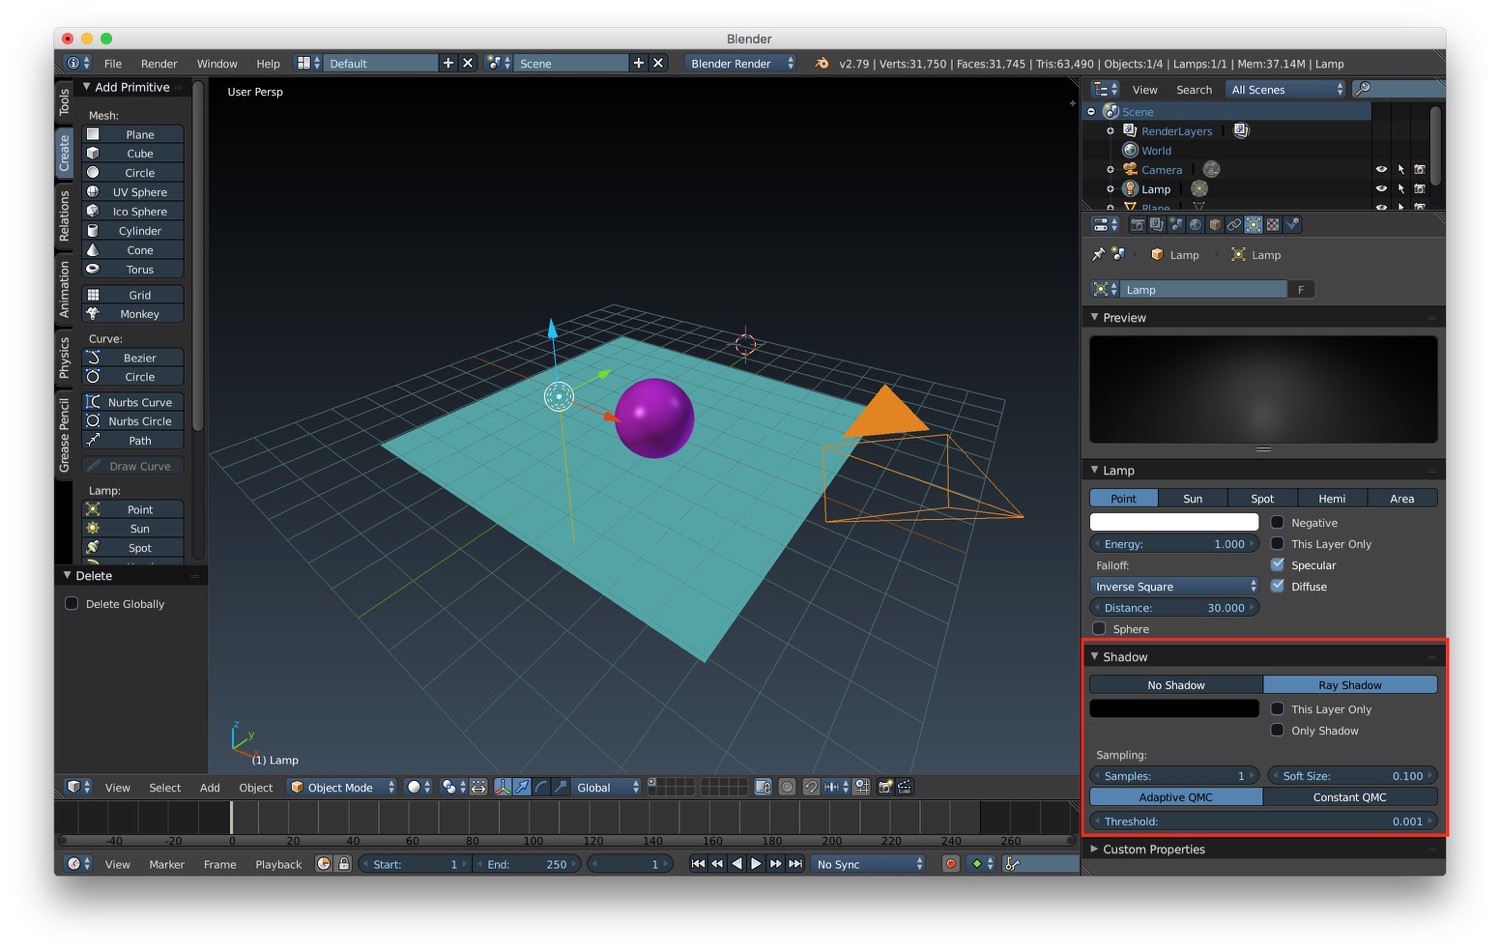
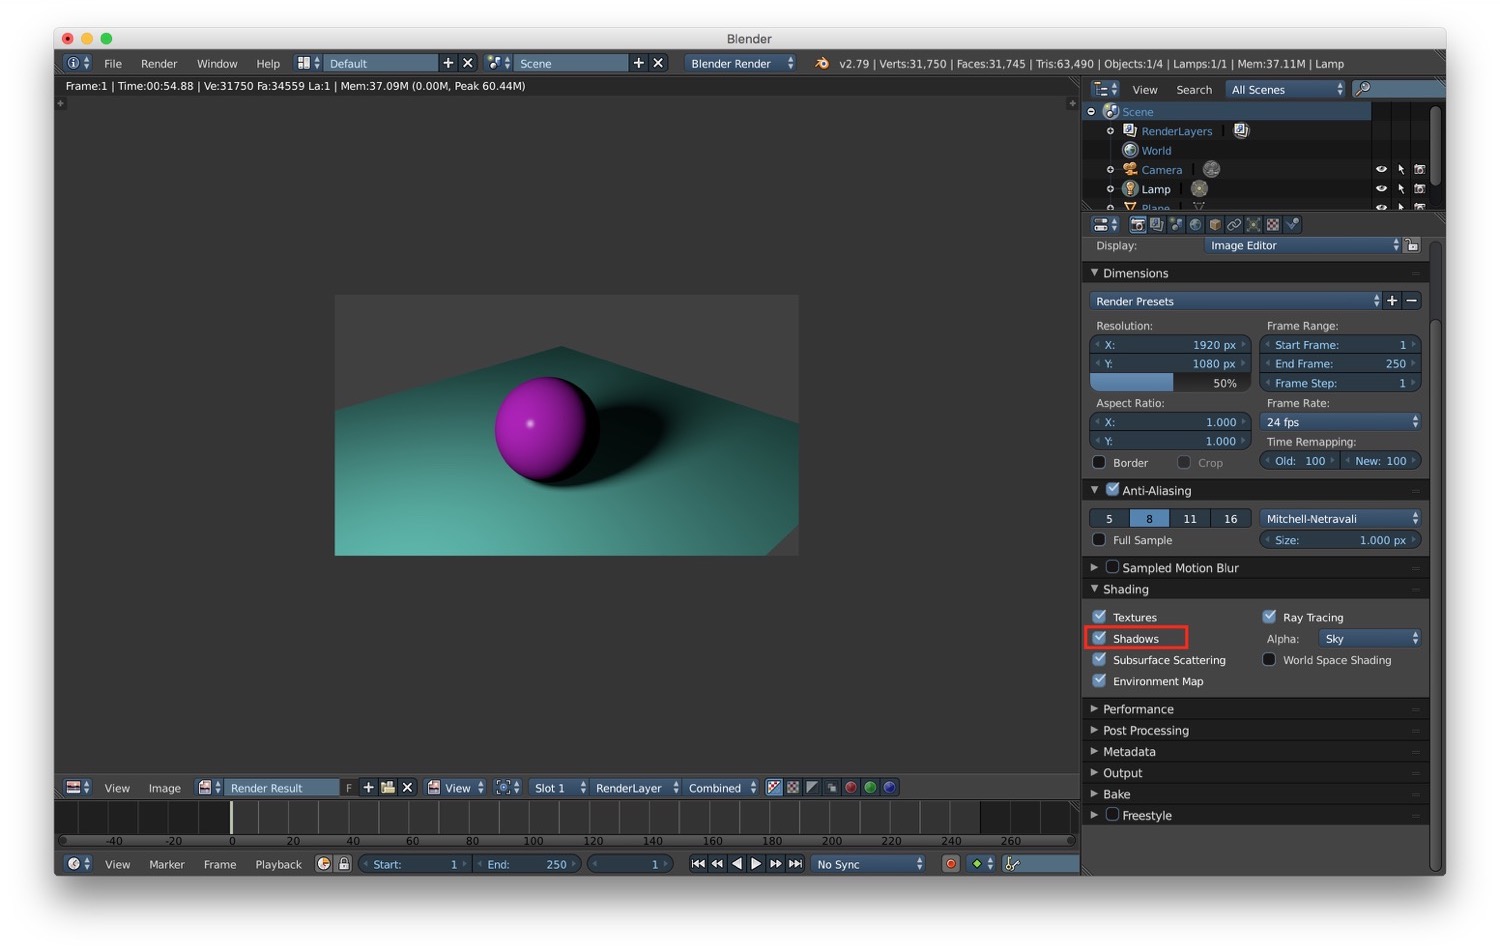
For the point light (and also some other kind of light) it is possible to enable shadows. To do that we have to choose ray shadow in the light properties panel and customize the look and feel of the shadow. Here we can also define the number of samples to be used to generate the shadows: the higher the better shadow we obtain (if you want to know more about ray tracing shadows, you can read this lecture. To actually render the shadow, we need also to set the shadow flag enable in the renderer settings properties panel.
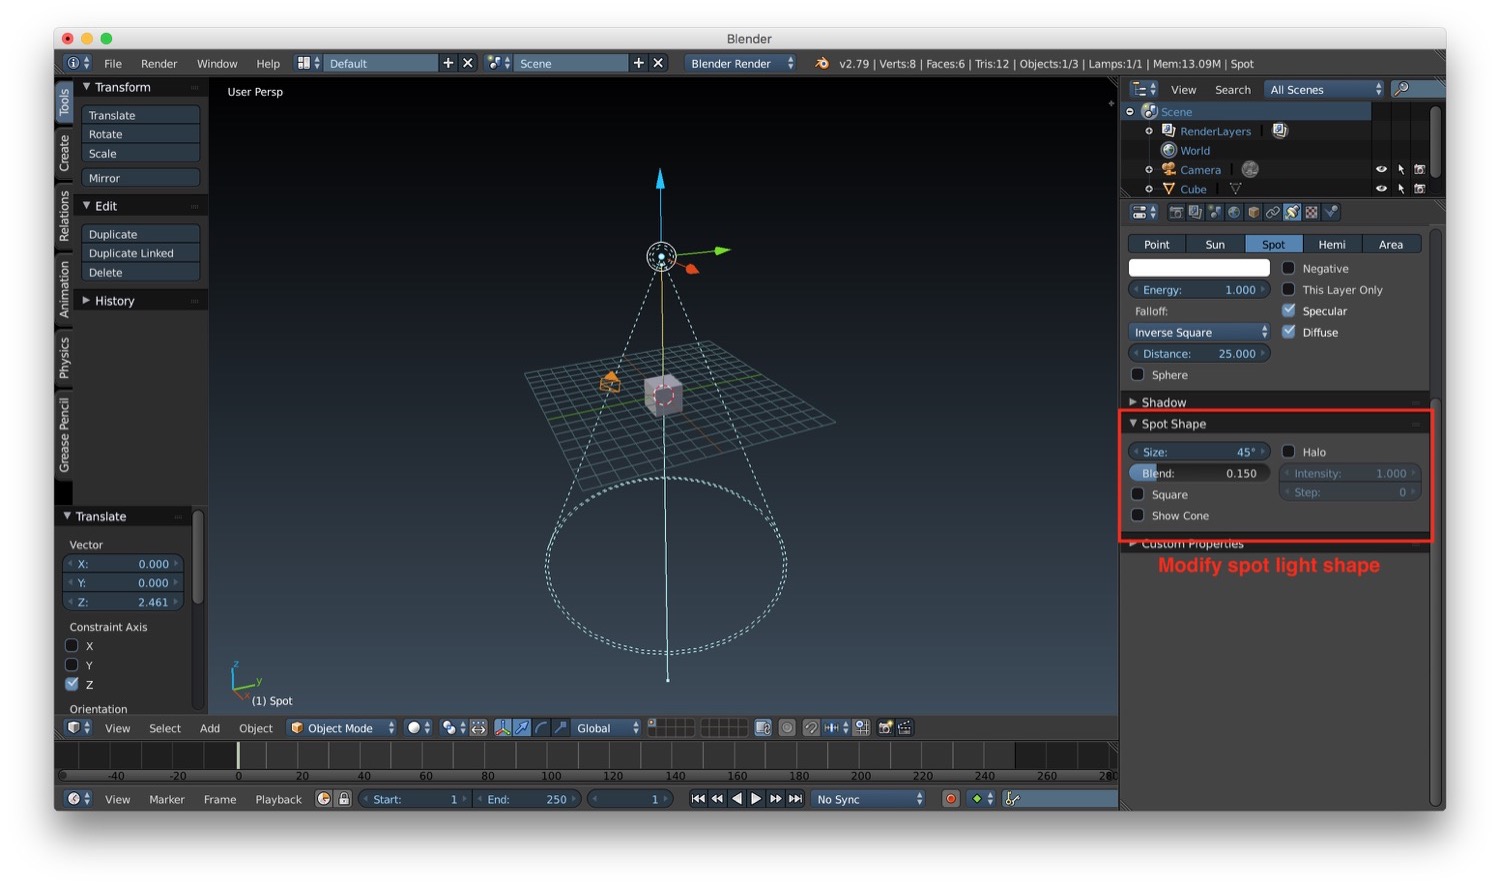
There are other types of lights. For example we have spot lamps. These are light with a specific dim that simulate a cone of light. We can customize its properties in the light tab in the properties panel. One thing to note for spot light is that we can customize the cone (shape, size...).
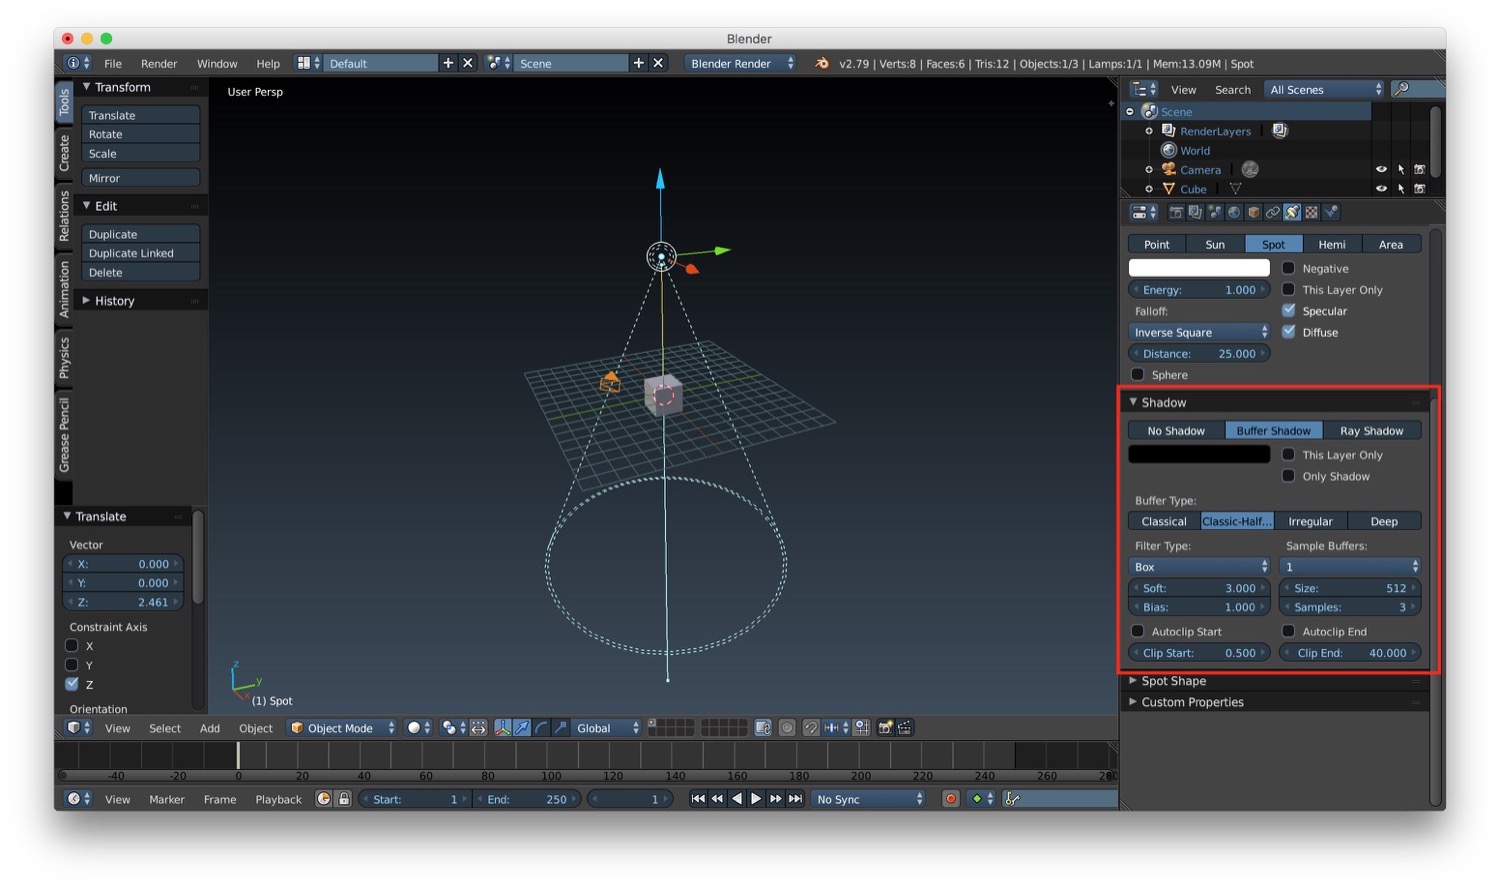
Spot light can use a new type of shadow called buffer shadow. They are useful because they can be rendered more quickly. After enabling it in the properties panel of the spot light, we can customize it as always. There are different type of buffer shadow:
- Classical
- Classical Half
- Irregular, a method to achieve ray-tracing alike shadows with good performance
- Deep, another method similar to ray tracing but much more expensive in terms of performance then Irregular
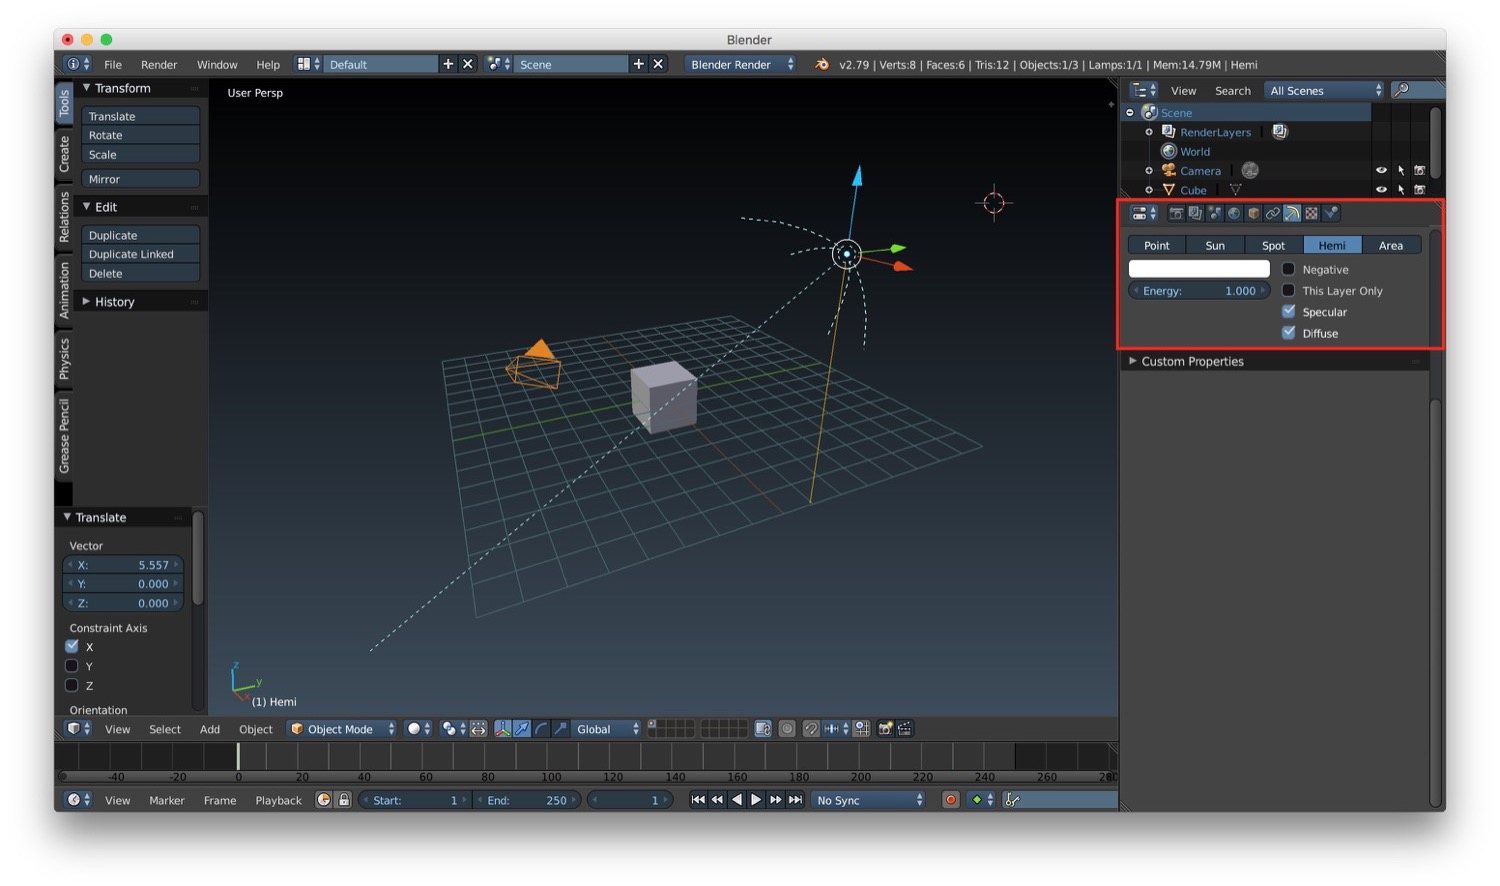
Another type of light is Hemi-lamps. This are used to create an overall directional light for you scene. As a consequence of the fact that it is a directional light, the position of it doesn't change the final lighting result. Only the orientation influences the final lighting result. As always, we can customize its behaviour in the properties panel.
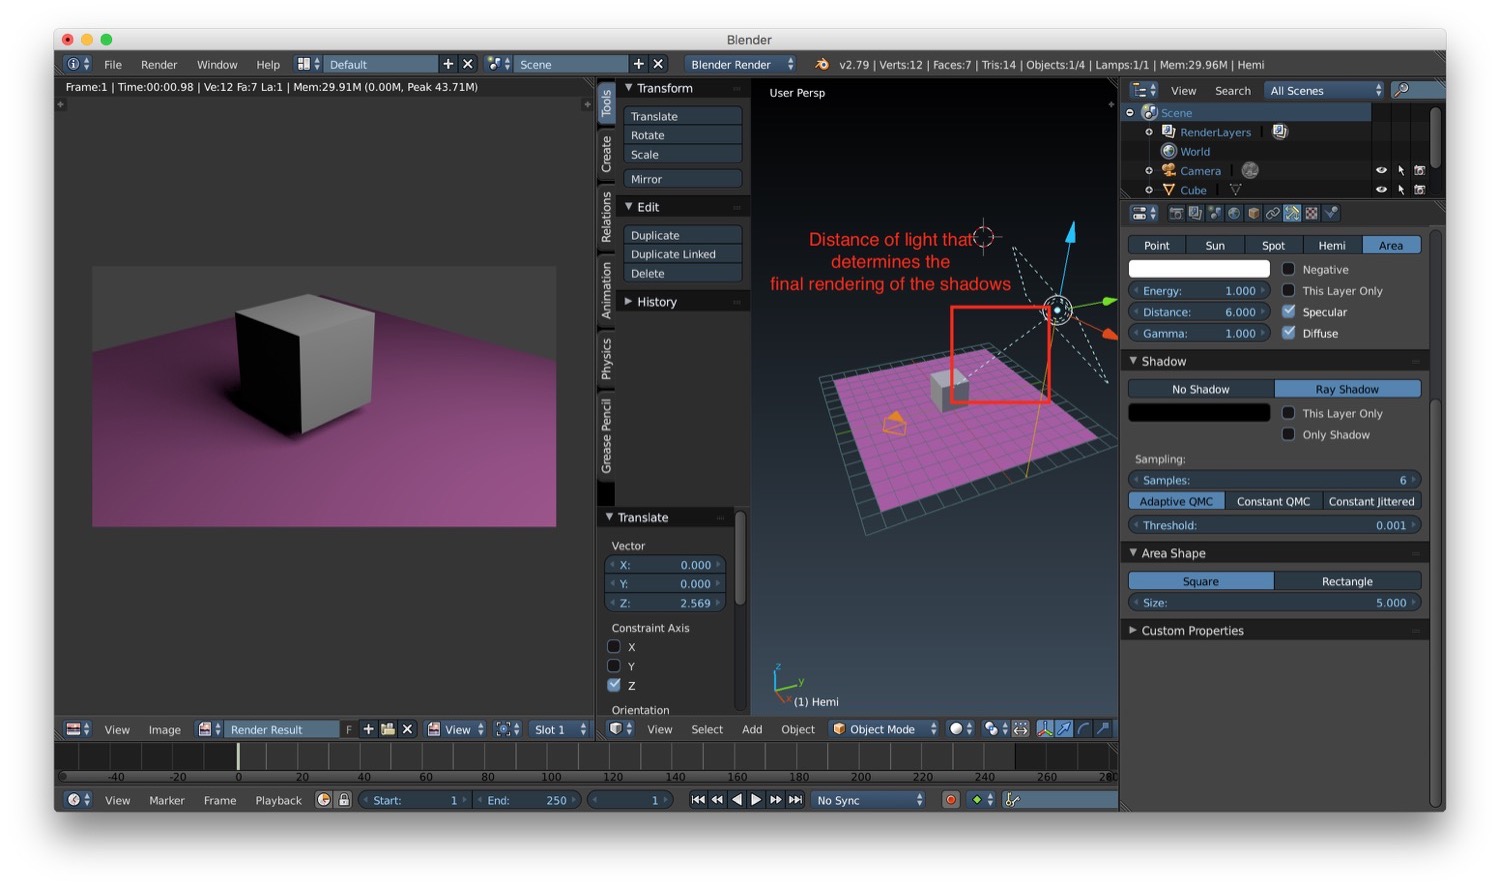
The last available type of light is the area lamps. This kind of light provide illumination from a specific region rather than a single point or a single direction. We can customize it as always from the properties panel. One important thing to note is that area light as a distance property instead of falloff. This parameter determines the final attenuation result. the distance is represented in the 3D window as a dashed line. The only type of shadow supported the ray traced shadow. We can also customize the shape of the shadow: different shapes influence the final rendering result.
In the next post we will talk about how to do other cool stuff with lights in Blender.
Read next

