
Blender tutorial: textures - part 2
·
In this new post of the series Blender tutorial I will talk about other textures techniques.
In the previous post of the series "Blender tutorial" we talked
about textures in Blender. In this post we will continue to learn how to use textures in Blender.
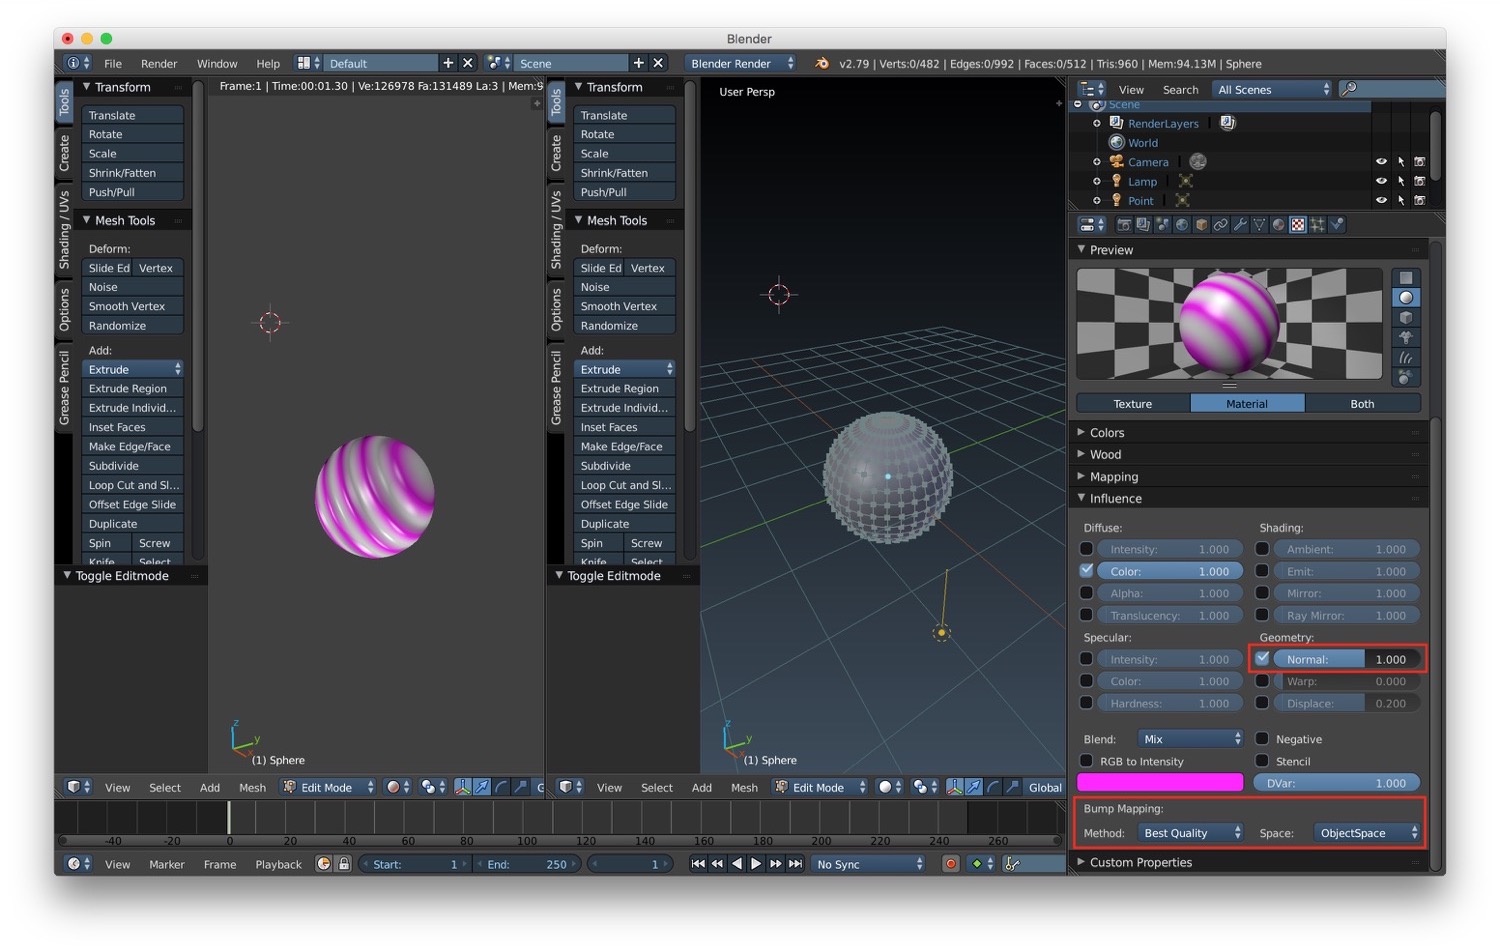
We will start with normal maps. This kind of texture let us simulate rough surfaces without adding geometric details to
the mesh. We can set bump mapping in the texture tab under the Influence section. By checking the Geometry -> Normal
checkbox we let the texture be used as a reference to modify the normals of the mesh so that we can simulate additional
geometry details. It is possible to modify the quality of the map by adjusting the option in the same panel.
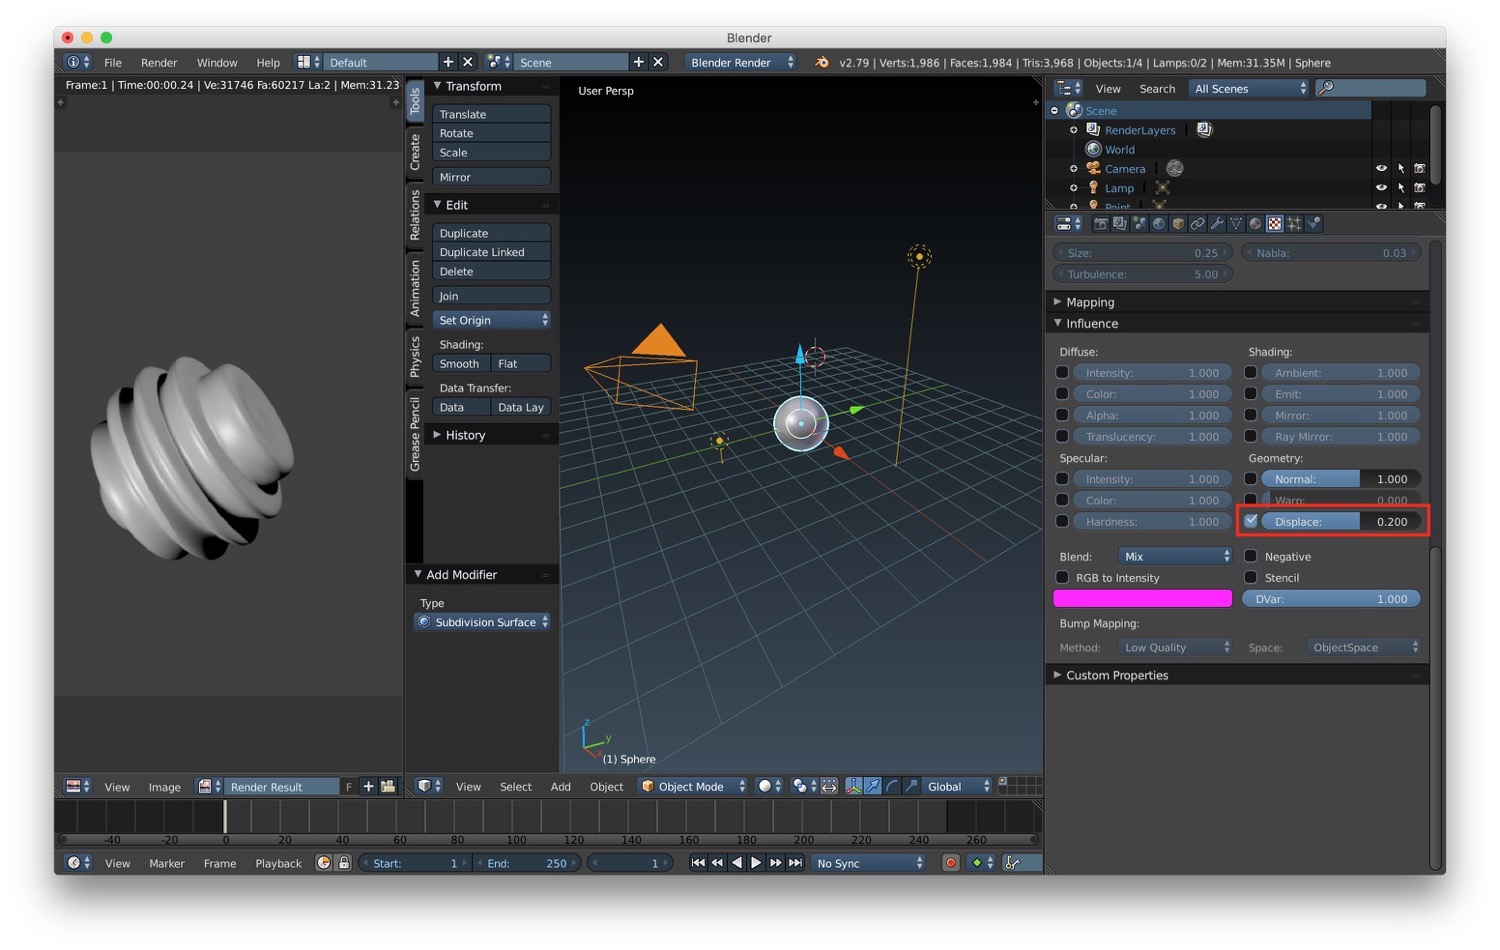
Another interesting texture technique useful to add details to our models is the displacement mapping. Instead of creating the illusion of additional details, the displacement mapping modifies the geometry of an object. We can activate the displacement mapping under the influence section of the texture tab. To obtain better result with the displacement mapping, it is useful to apply a subdivision surface modifier to the object.
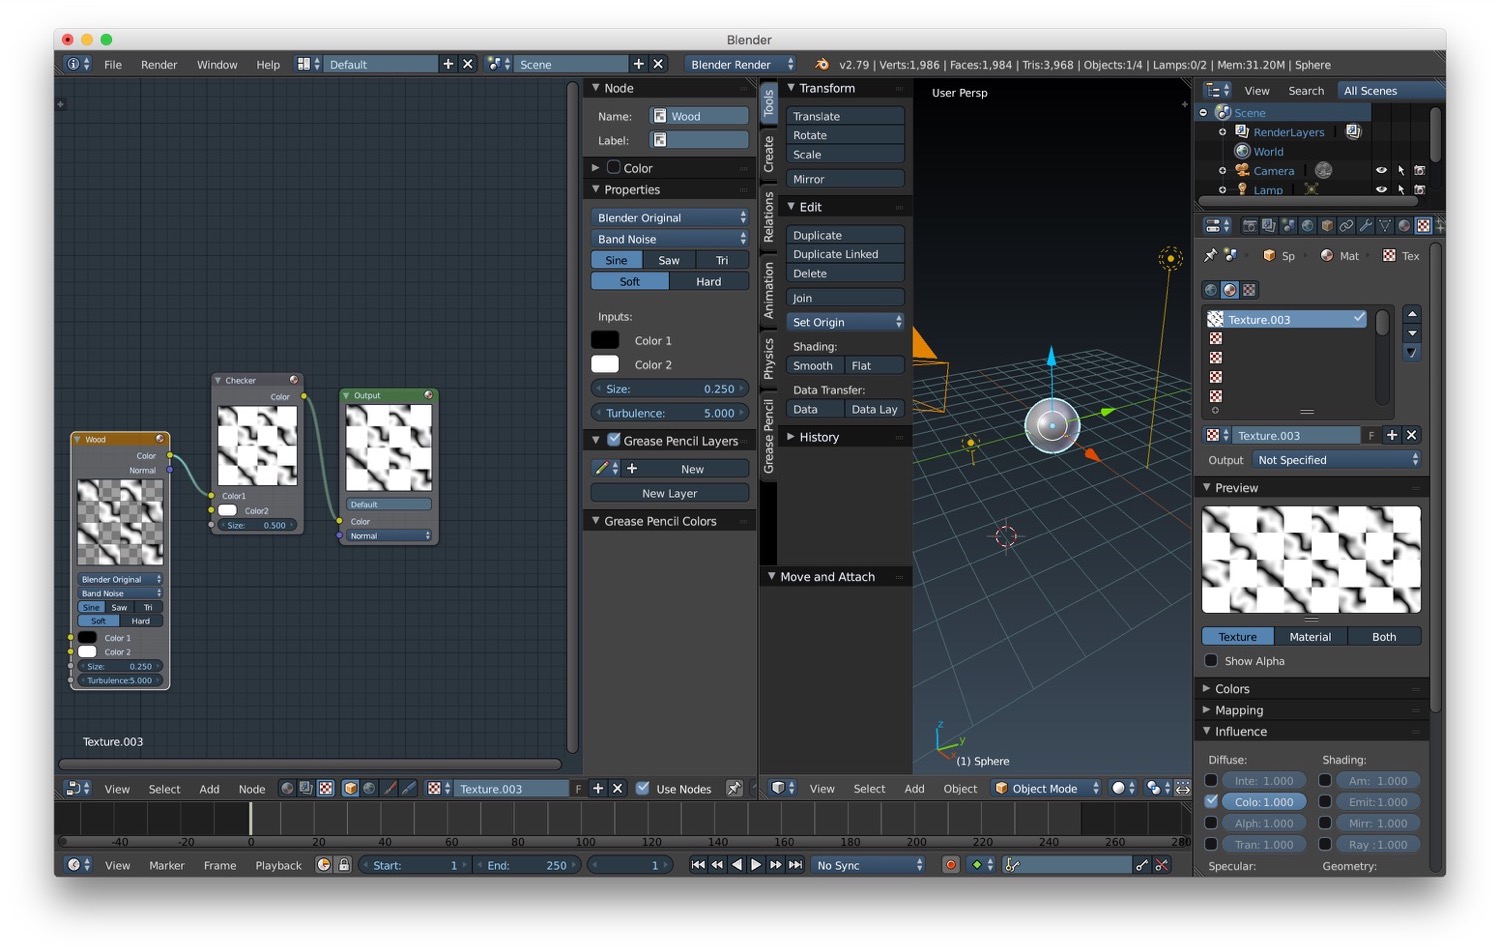
One final tool we have for textures is the node editor. With it we can join multiple textures into a single one to obtain a more complex texture. We can activate it in a new window by selecting the "Node Editor" visualization. After we activate the "Use nodes" option we compose complex texture by adding more node (with the menu at the bottom of the view) and we can compose them to obtain our final texture.
In the next post we will talk about light.

