
Blender tutorial: outliner, layers, groups, hierarchies and scenes
·
In this new post of the series Blender tutorial I will talk about outliner, layers, groups, hierarchies and scenes.
In the previous post of the series "Blender tutorial" we talked
about advanced modeling in Blender. In this post we will continue to explore the capabilities of Blender by analyzing
outliner, layers, groups, hierarchies and scenes.
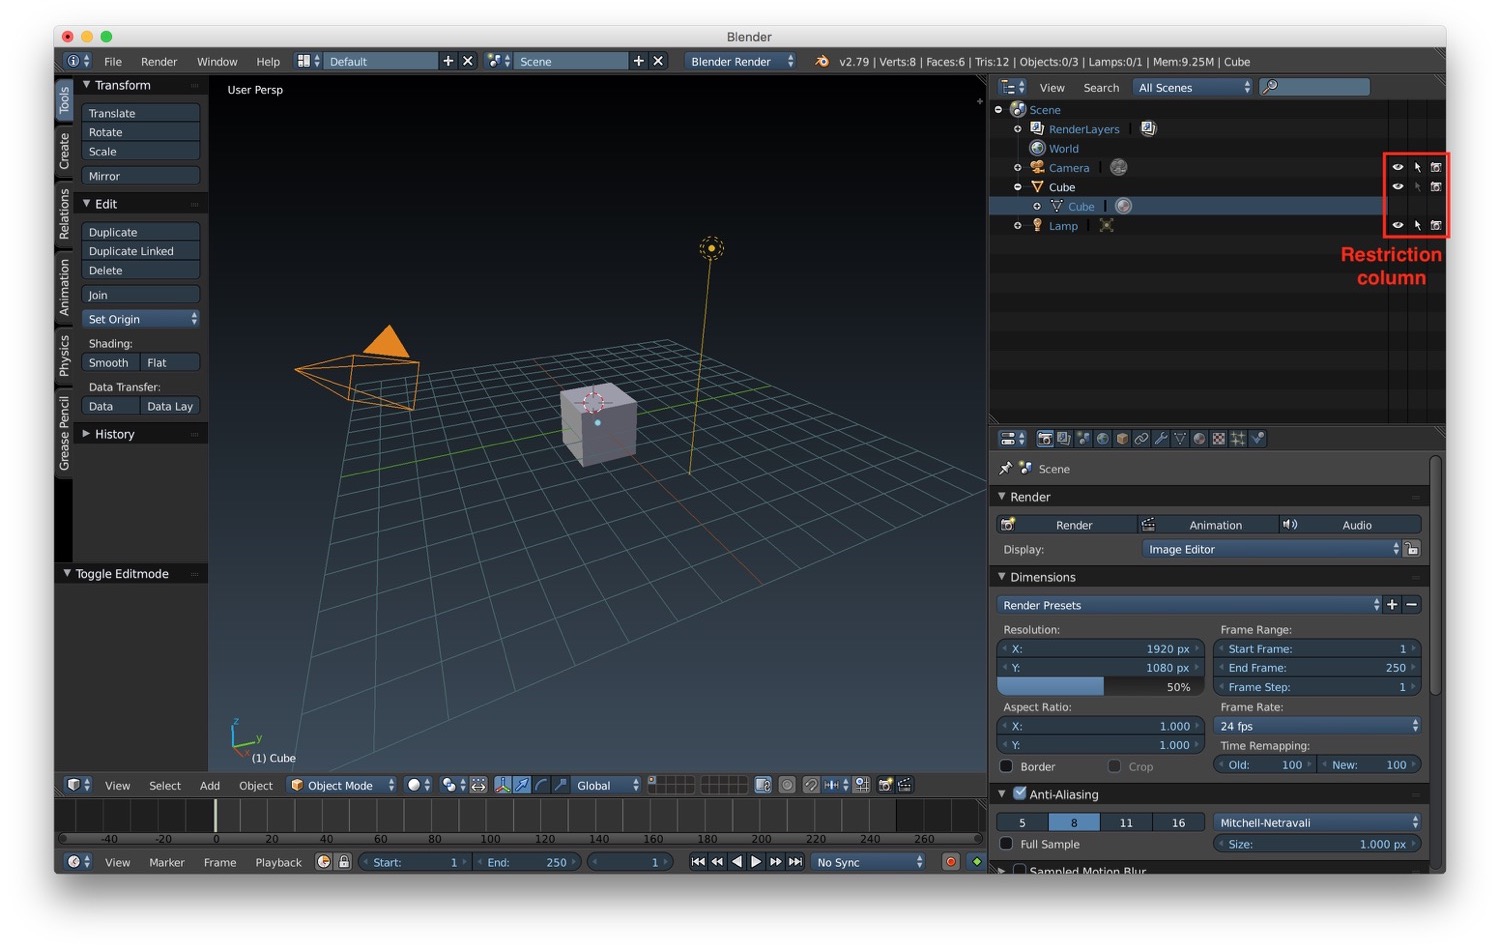
Let's start from the outliner. This one contains the complete list of the objects contained in the scene. Each on of
them is represented with its material and geometry. It is possible to rename a mesh by right clicking on it and
choosing rename. To the right of each mesh we have the restriction column. It contains 3 buttons:
- the first button let us hide meshes in the 3D window
- the second button let us set a mesh as not selectable
- the third button let us hide meshes from the final renderer
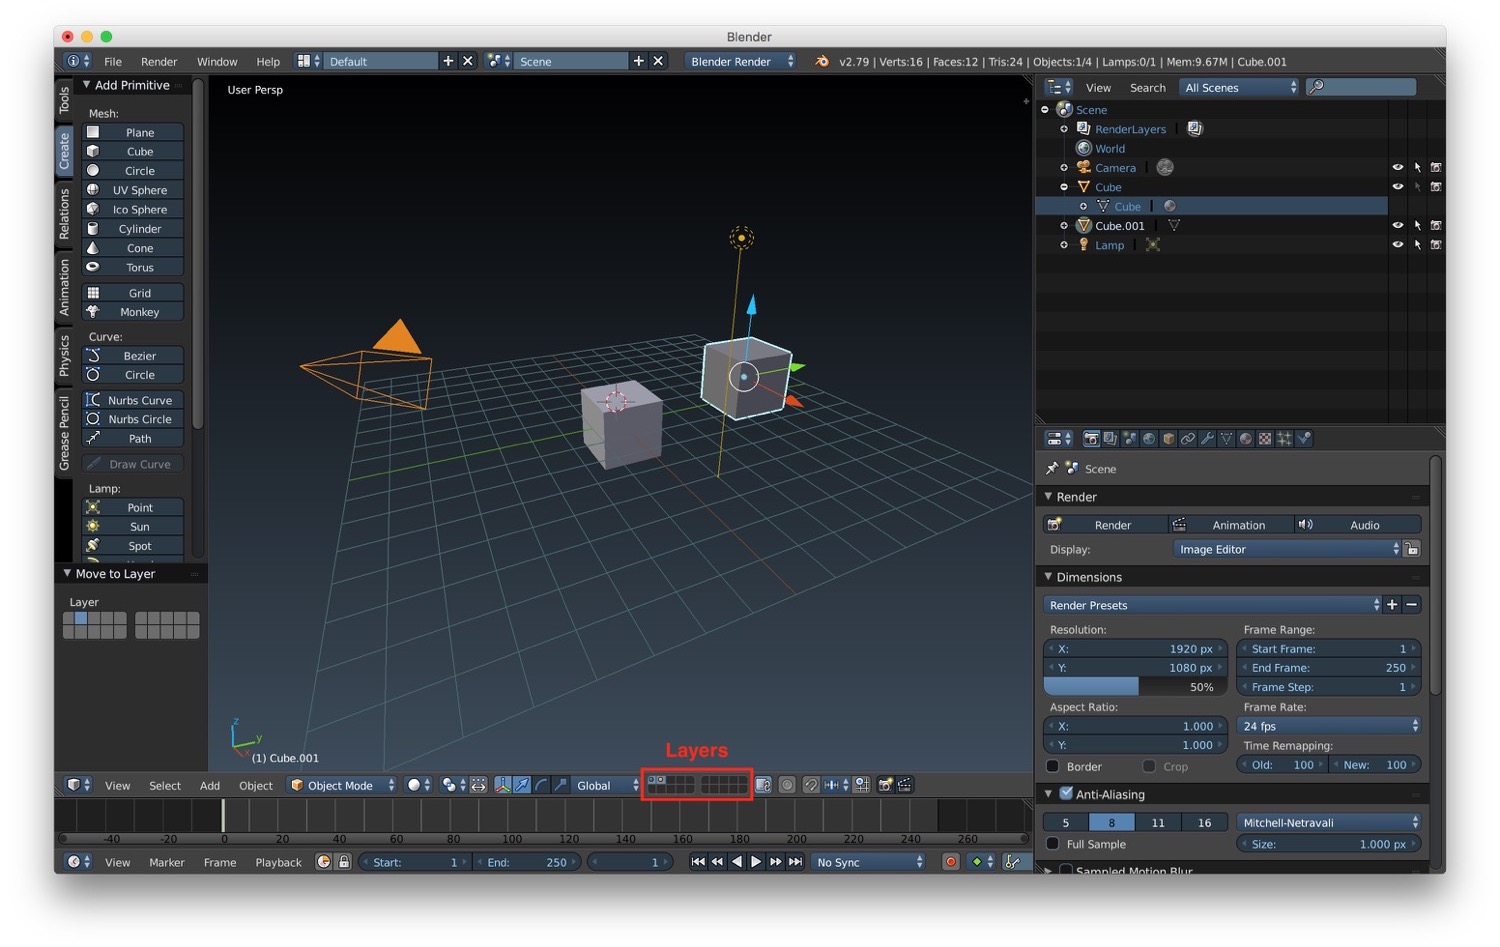
Now let's talk about layers. We can find the layer panel at the bottom of the 3D window. Each layer is represented with a button similar to a checkbox. We can turn on/off a layer by clicking on their corresponding button. We can add a mesh to a specific layer by selecting the layer and creating the mesh we want (primitive or import it). We can also move layer by using the m key shortcut or by using the menu Object -> Move to layer.
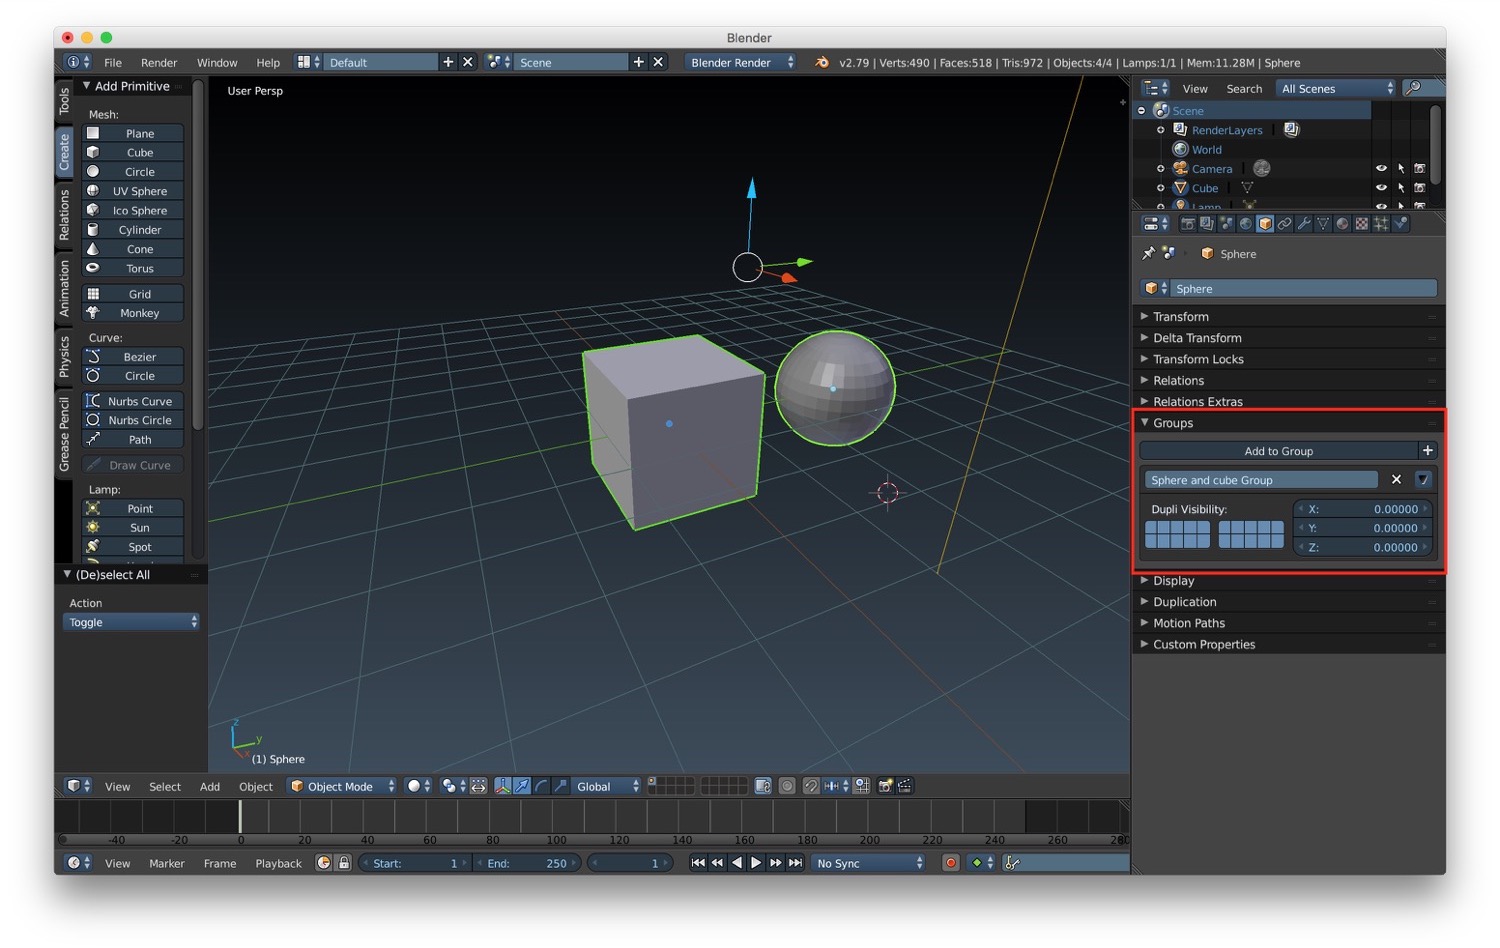
Another way to organize our objects is by using groups. With groups you can select multiple objects at once. We can create groups and add an object to an existing group by using the menu in the property panel or by using the ctrl + g keys shortcut.
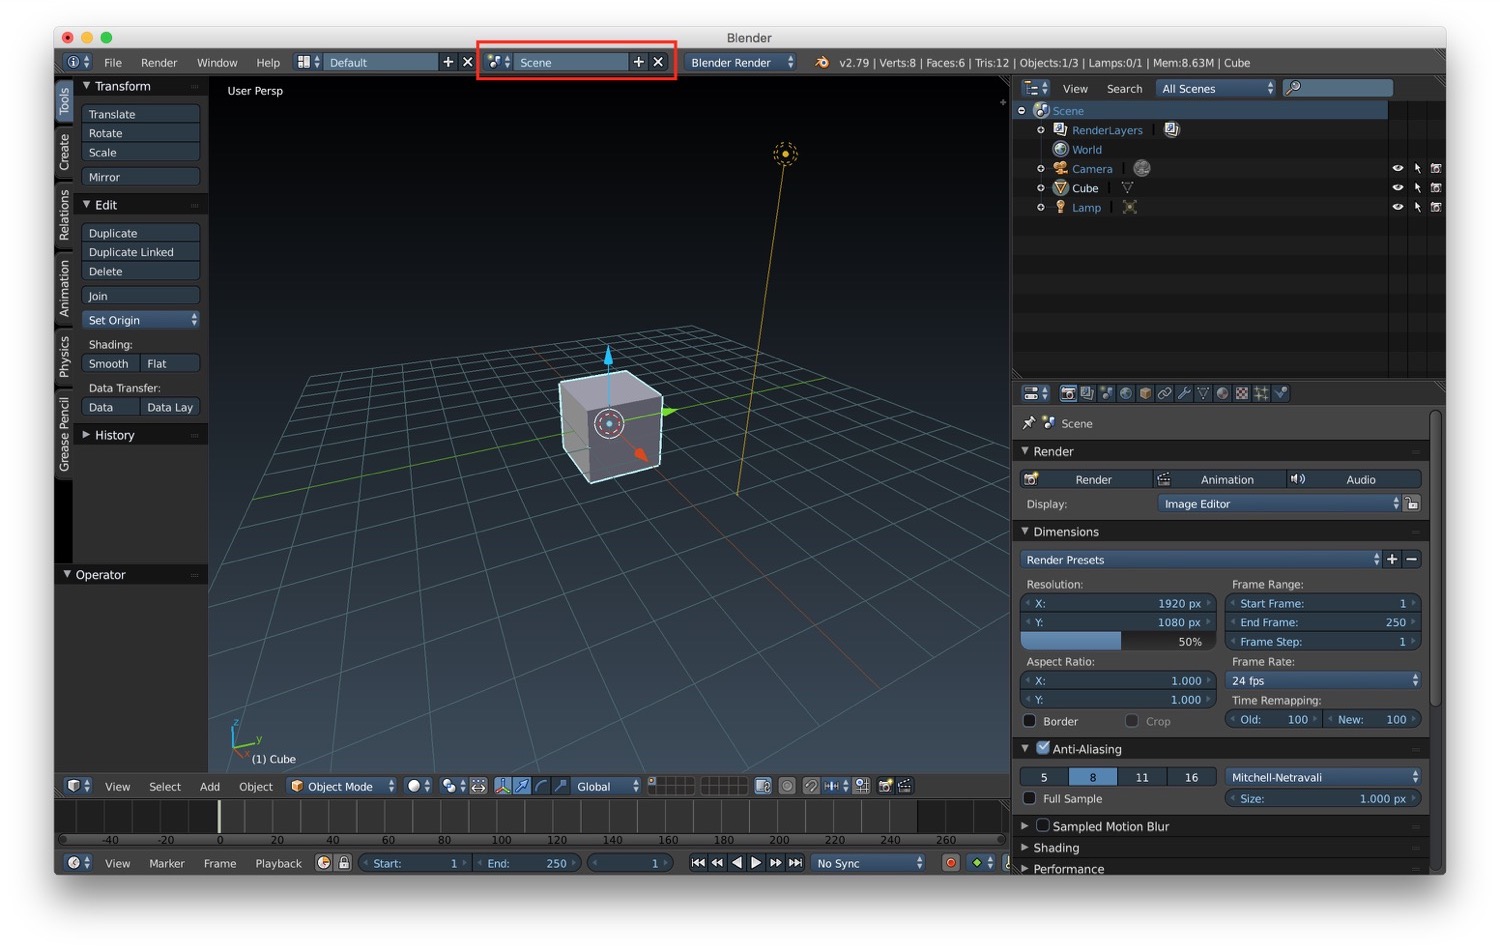
After layers and group we have scenes. Scenes allow us to create different set of our objects or new set with new object inside our project. We can create and manage scenes by using the outliner and the ad hoc menu at the top of the 3D window. We can create scenes that:
- are linked together: this means that a modification to one mesh in a scenes will be reflected also in the other.
- separated scene: this means that a modification to one mesh in a scenes will NOT be reflected also in the other.
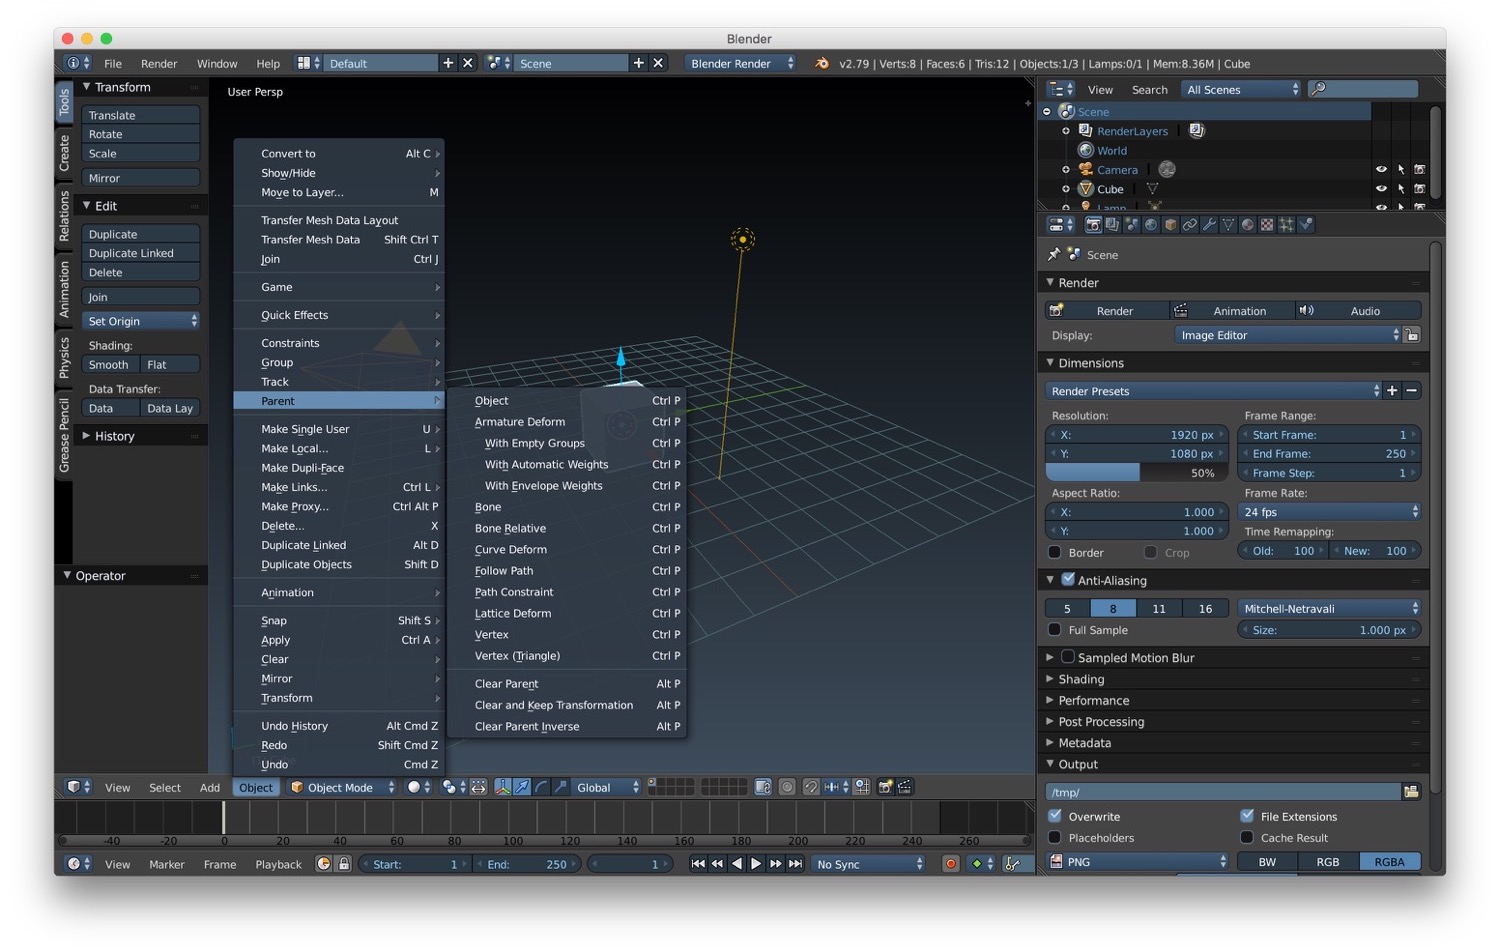
Last but not least we have hierarchies. We can create hierarchies of objects by selecting them and by choosing * Object -> Parent*. Here we can find all the possible type of parental relationships that we can create. After creating a hierarchies of objects, they will be shown grouped in the outliner. We will use hierarchies extensively when we will talk about animation.
In the next post we will talk about materials.

