Blender tutorial: advanced modeling
·
In this new post of the series Blender tutorial I will talk about advanced modeling in Blender.
In the previous post of the series "Blender tutorial" we
talked about the basics of modeling in Blender. In this post we will study Blender advanced modeling tools.
Let's start from modifiers. All the operation we saw in the previous modeling post were all "one time operation":
after we apply them we can't change their properties to modify the result we obtain. Modifiers let us apply modification
to a mesh that is possible to revert, modify and preview. When we are sure about the result, we can apply the modifier
to get the mesh modification we want.
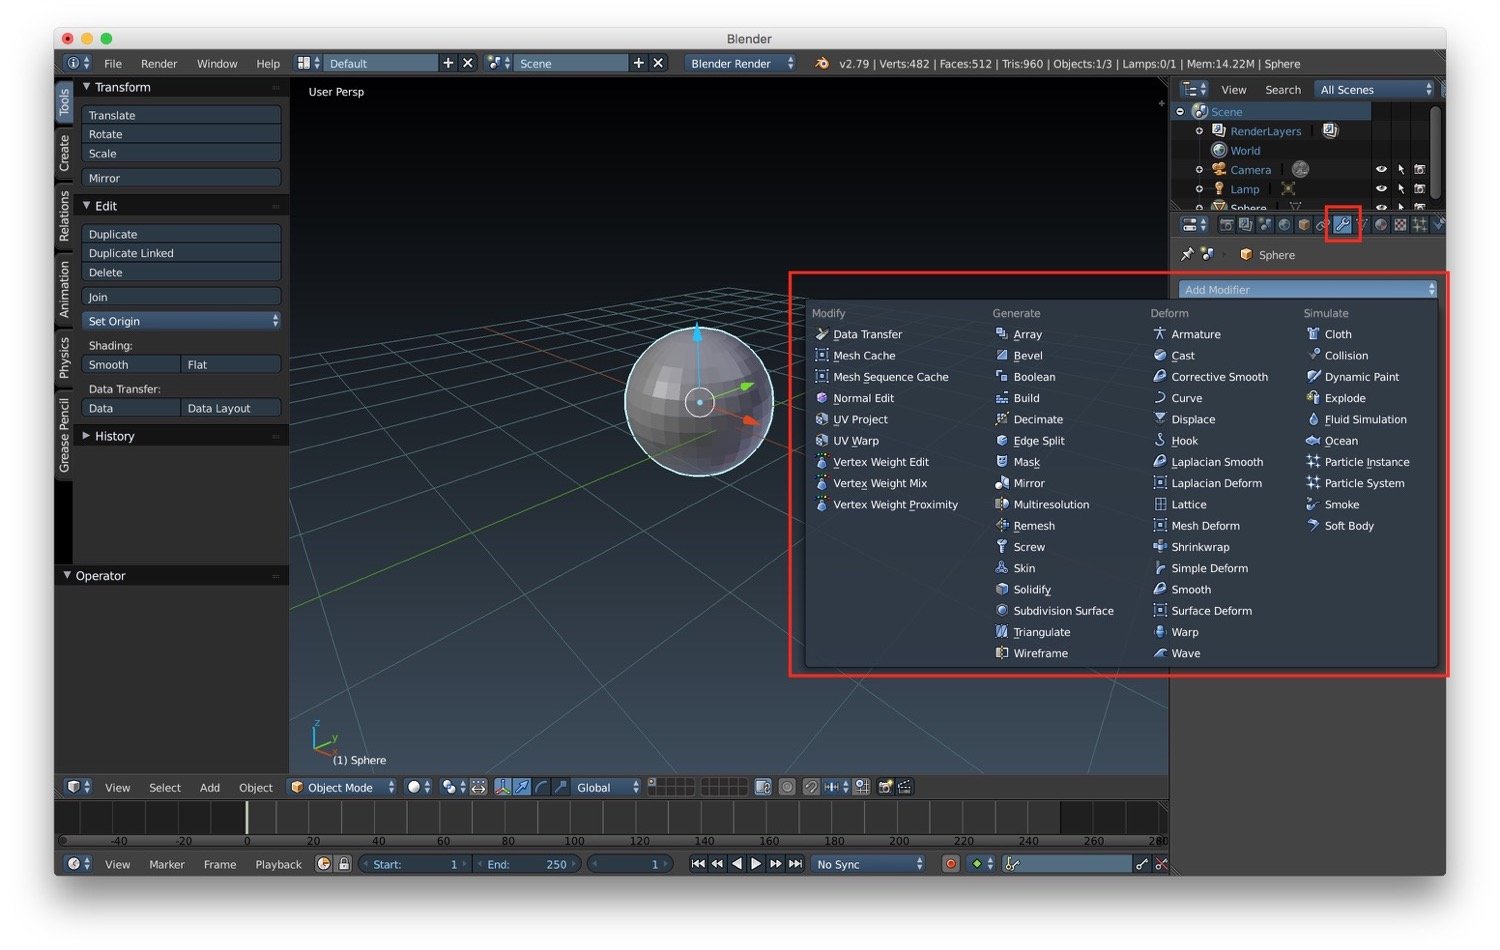
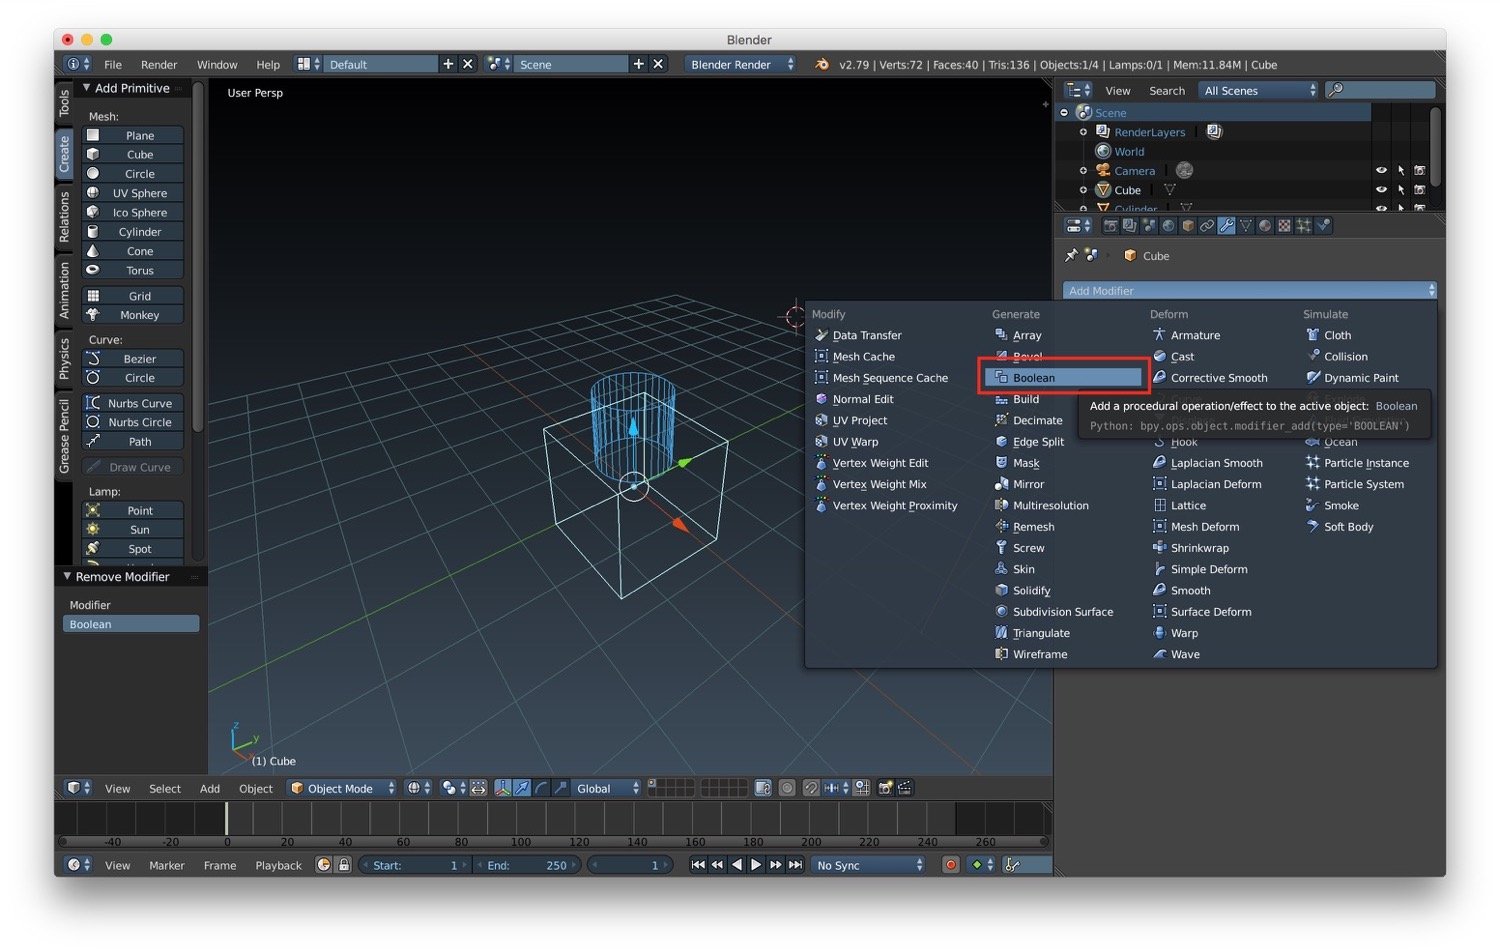
We can apply a modifier by selecting an object (right click on it) and go under the properties panel and click on the
wrench icon. Here we can select a modifier from the list Add modifier.
For example let's try to add a simple deform to a cube. After adding it we see our cube deformed. We can than tweak the parameters of the deformation as we prefer. Each modifier as its own properties, based of which type of modification it applies to the mesh. Anyway there are some common button to:
- show/hide the modifier result during rendering
- show/hide the modifier result in the 3D window
- show/hide the modifier result in the 3D window in Edit mode
- show/hide the cage of the modifier in the 3D window
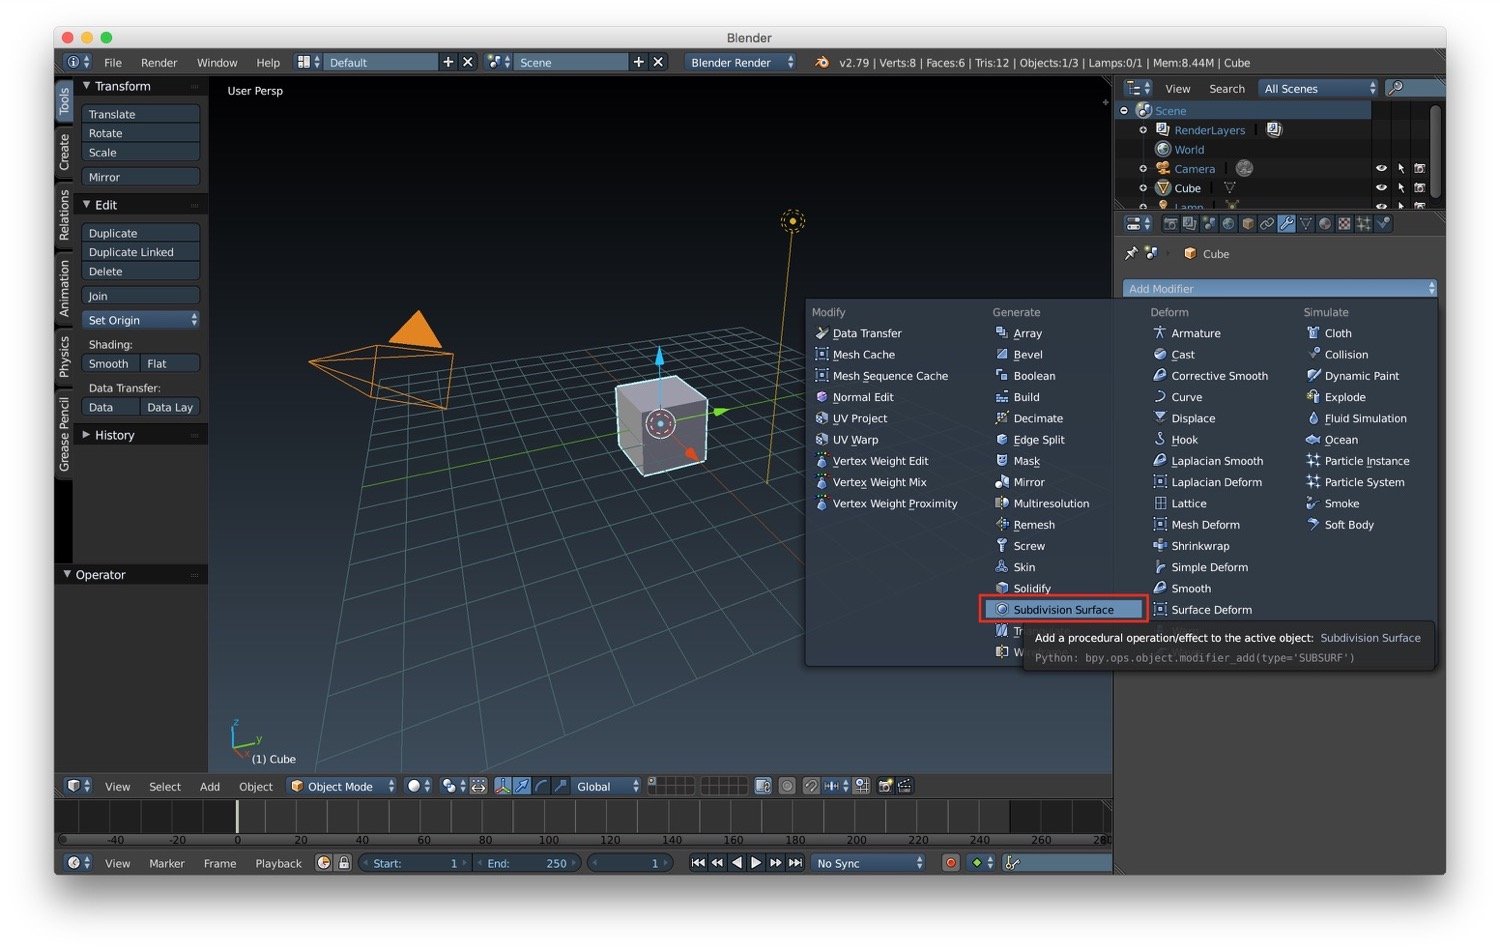
After that we have the subdivision surface. As stated on Wikipedia, subdivision surface is a technique discovered simultaneously by Edwin Catmull and Jim Clark:
A subdivision surface, in the field of 3D computer graphics, is a method of representing a smooth surface via the specification of a coarser piecewise linear polygon mesh. The smooth surface can be calculated from the coarse mesh as the limit of recursive subdivision of each polygonal face into smaller faces that better approximate the smooth surface.
This basically means that with subdivision surface we can approximate smoother surfaces starting from another one.
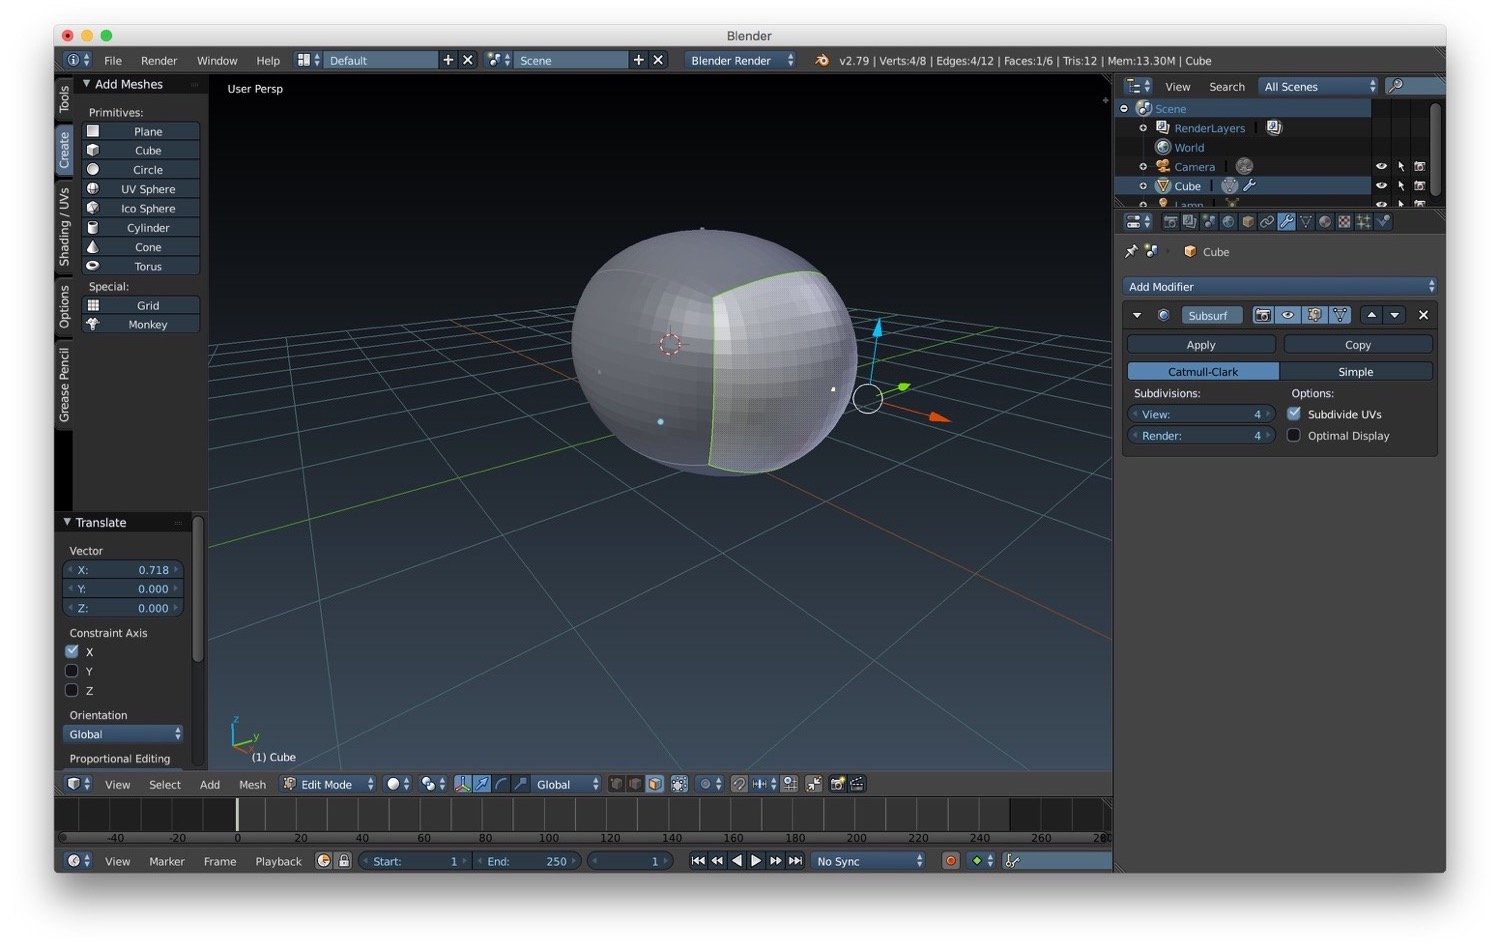
In Blender we can apply subdivision surface as a modifier.
After the subdivision is applied it is possible to modify the mesh only on the original edges and faces of the mesh. In fact this elements will be the only one that we can select from our mesh.
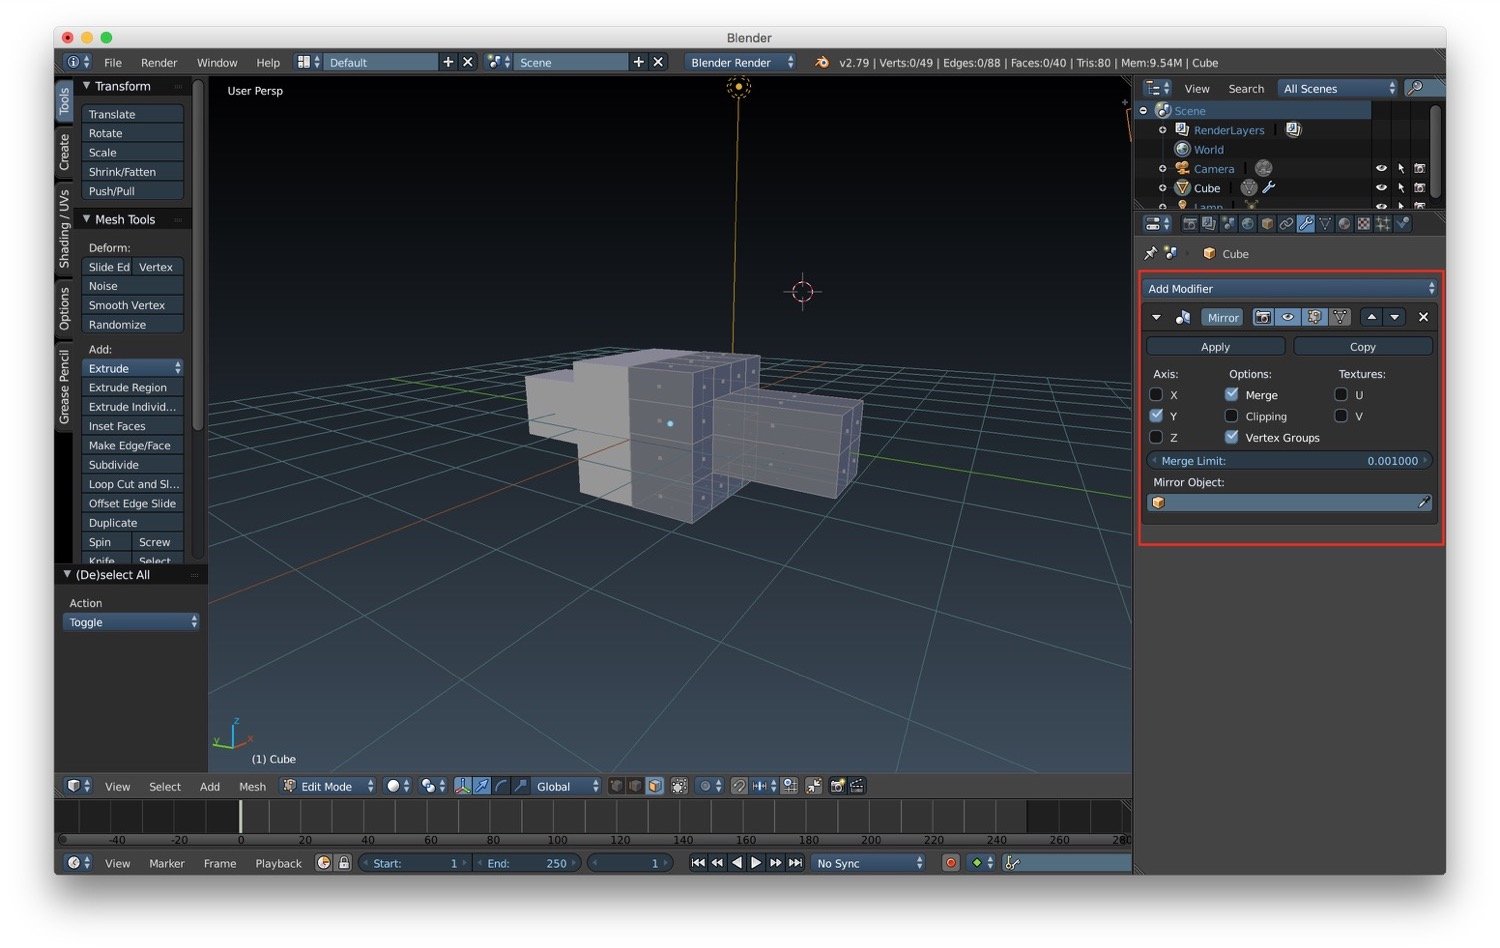
Another interesting modifier is the mirror modifier. It is especially useful when you need to do Symmetric modeling. After applying this modifier every operation you made on one side of your mesh will be mirrored on the other side. For this reason, especially when you're modeling some character/organic mesh, it is useful to delete one side of the mesh and mirror the other one (with all the modification you do). In the option of the modifier you can choose on which axis the mirroring must be applied.
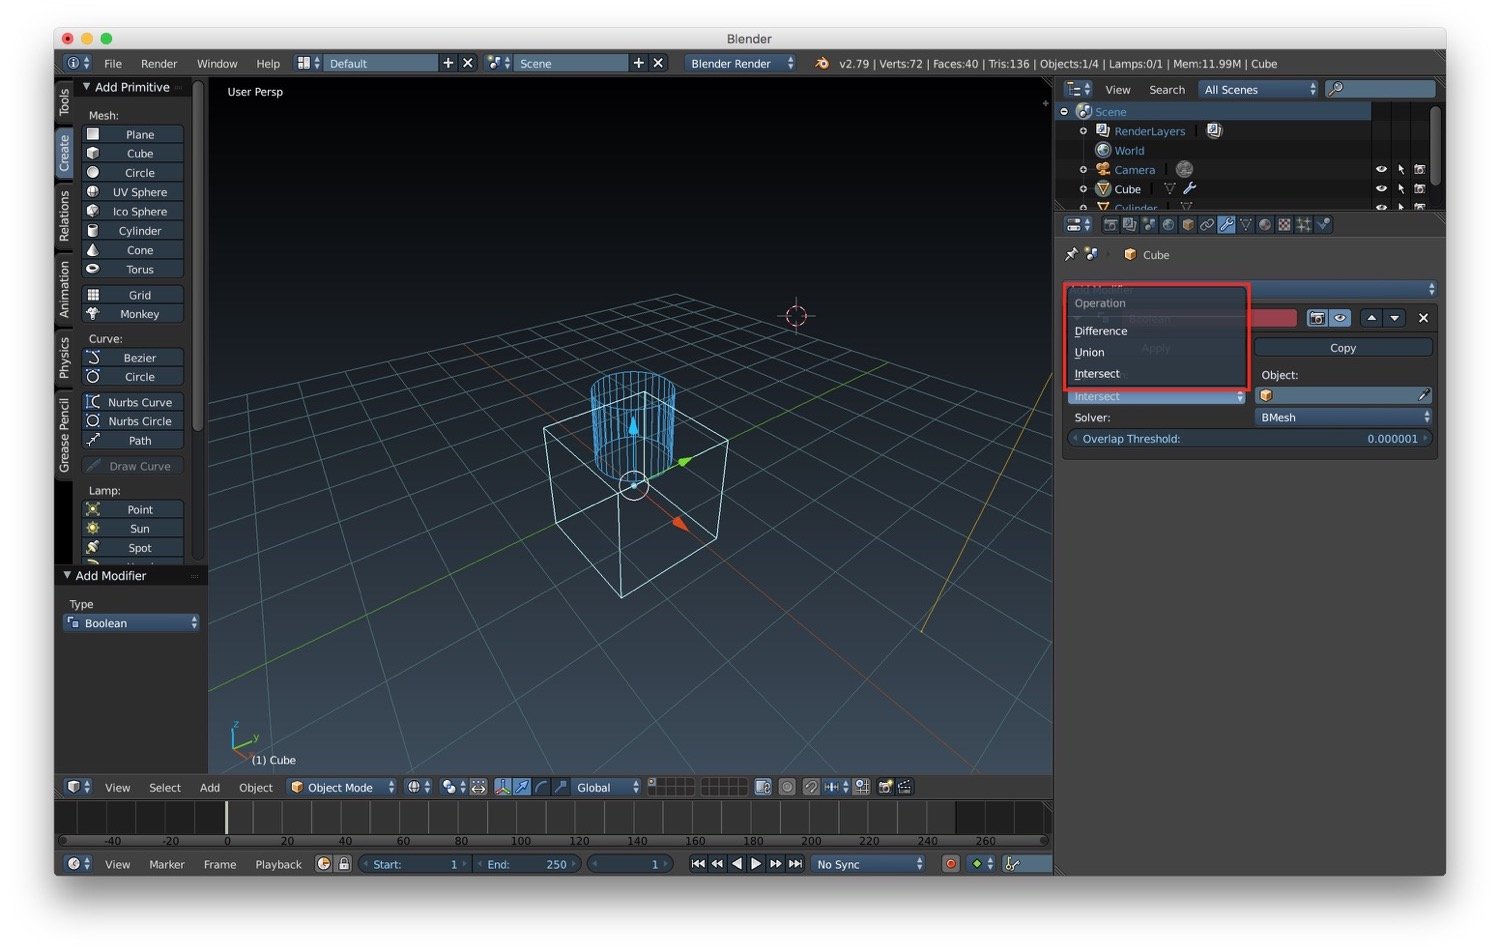
The last interesting modifier (for now) we will see it is the boolean modifier. This modifier let us modify meshes by calculate difference, union and intersection between them.
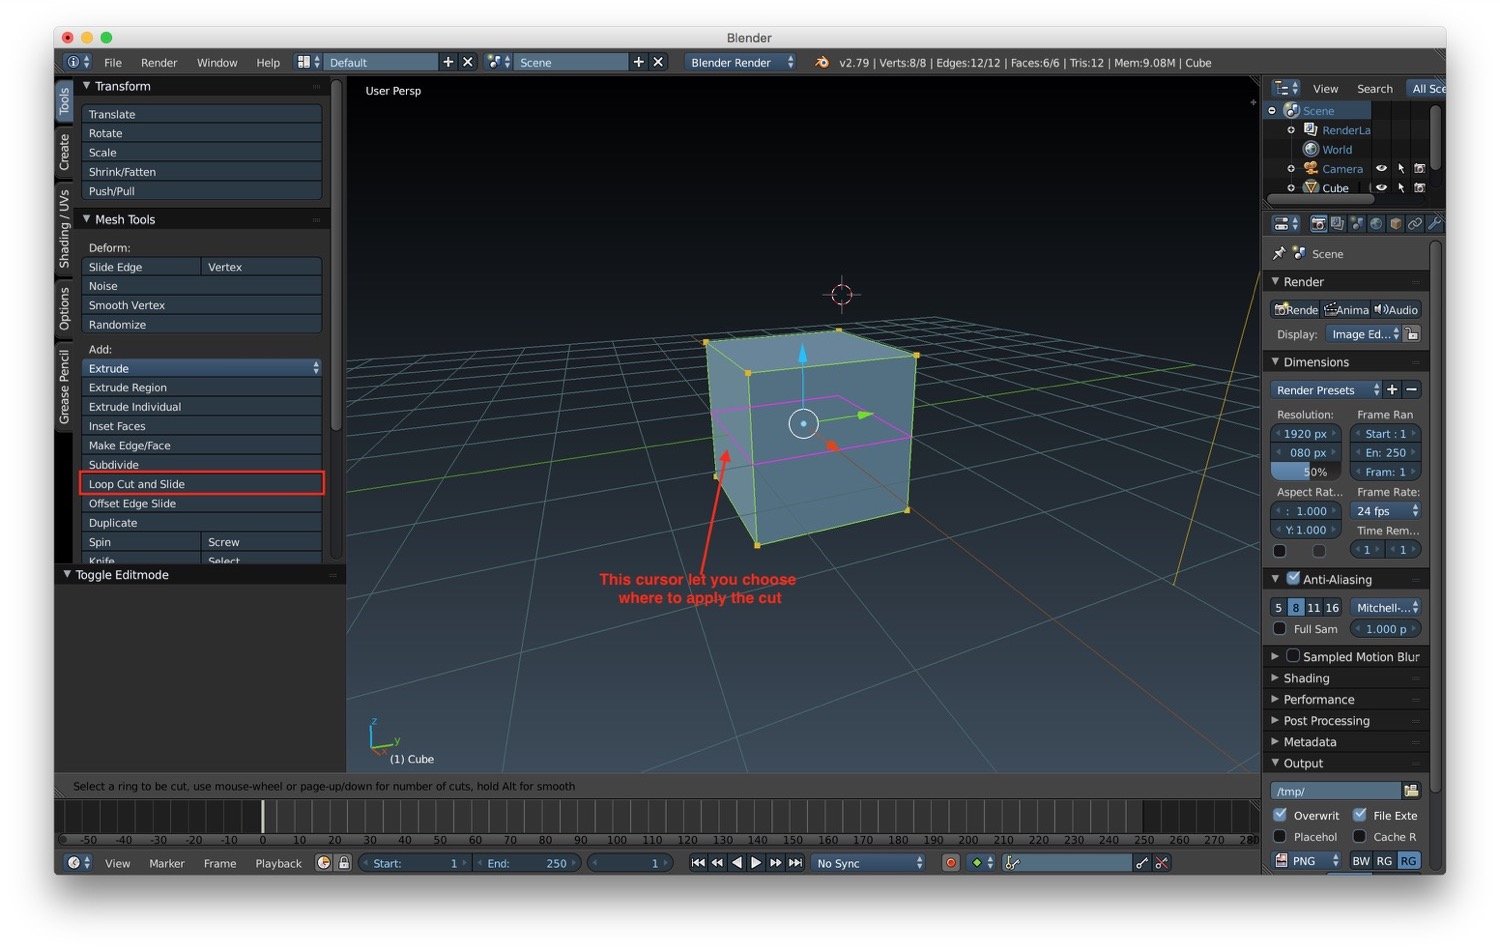
Another interesting tool is the "Loop Cut and Slide". With this option we can add edge loops to our mesh. This tool is useful especially when you need to have more mesh polygon to model the mesh details you want.
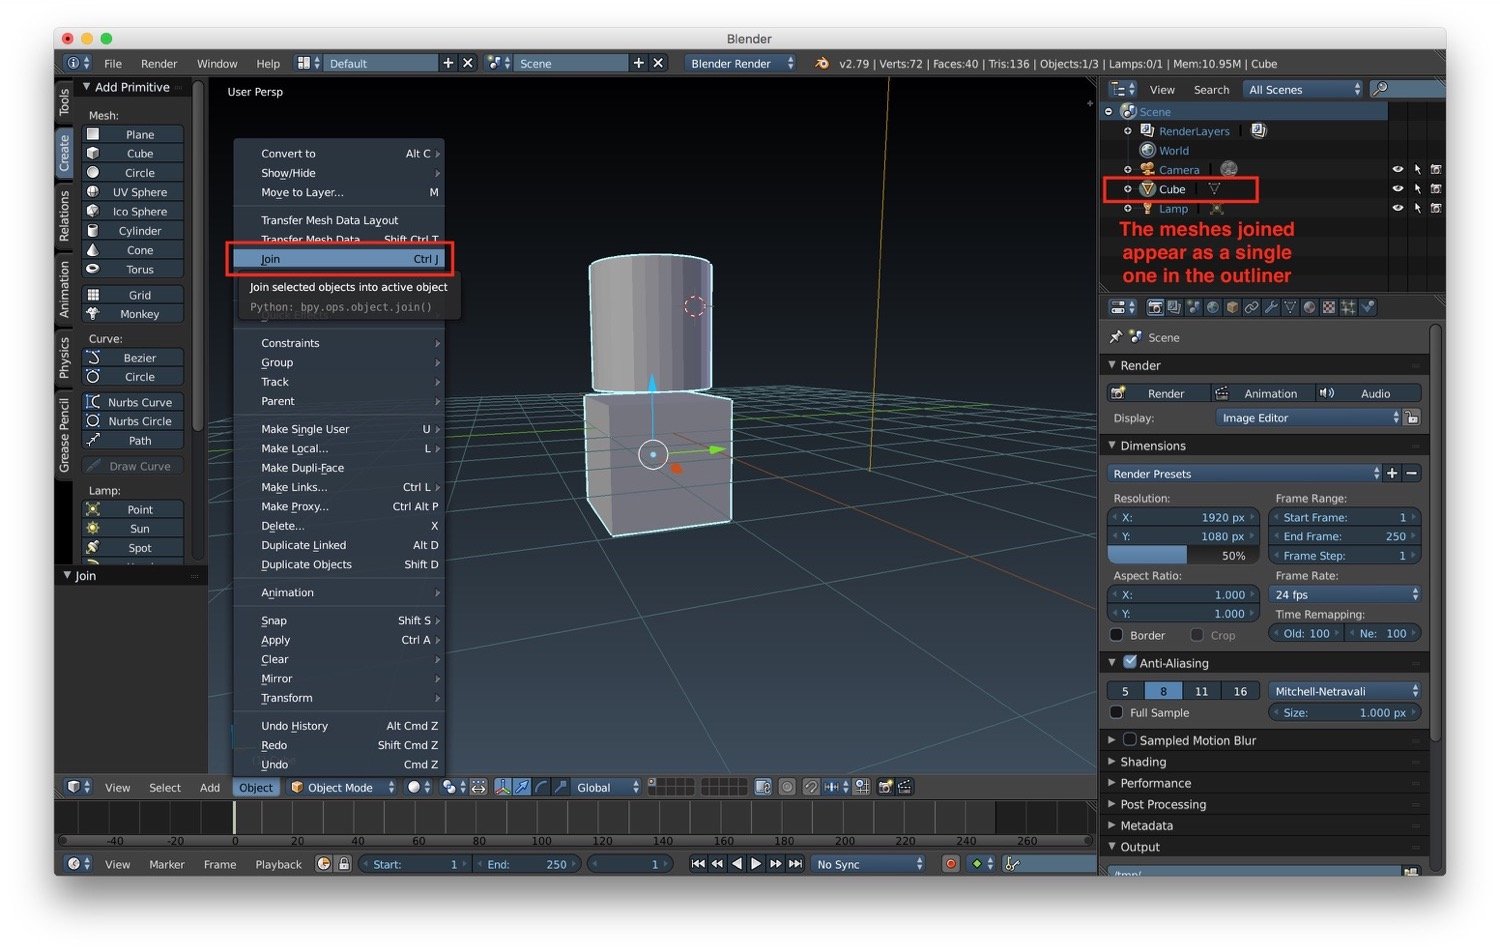
Then we have the joining mesh tool and the stitching vertices tool. For the first one, as the name suggest, you can combine multiple mesh into a single one in blender. To join two or more meshes, we have to select them while we are object mode. Remember: the last one selected will be the mesh to which the other ones will be joined. After that we can apply the join mesh using:
- the menu option Object -> Join
- the shortcut "ctrl + j keys"
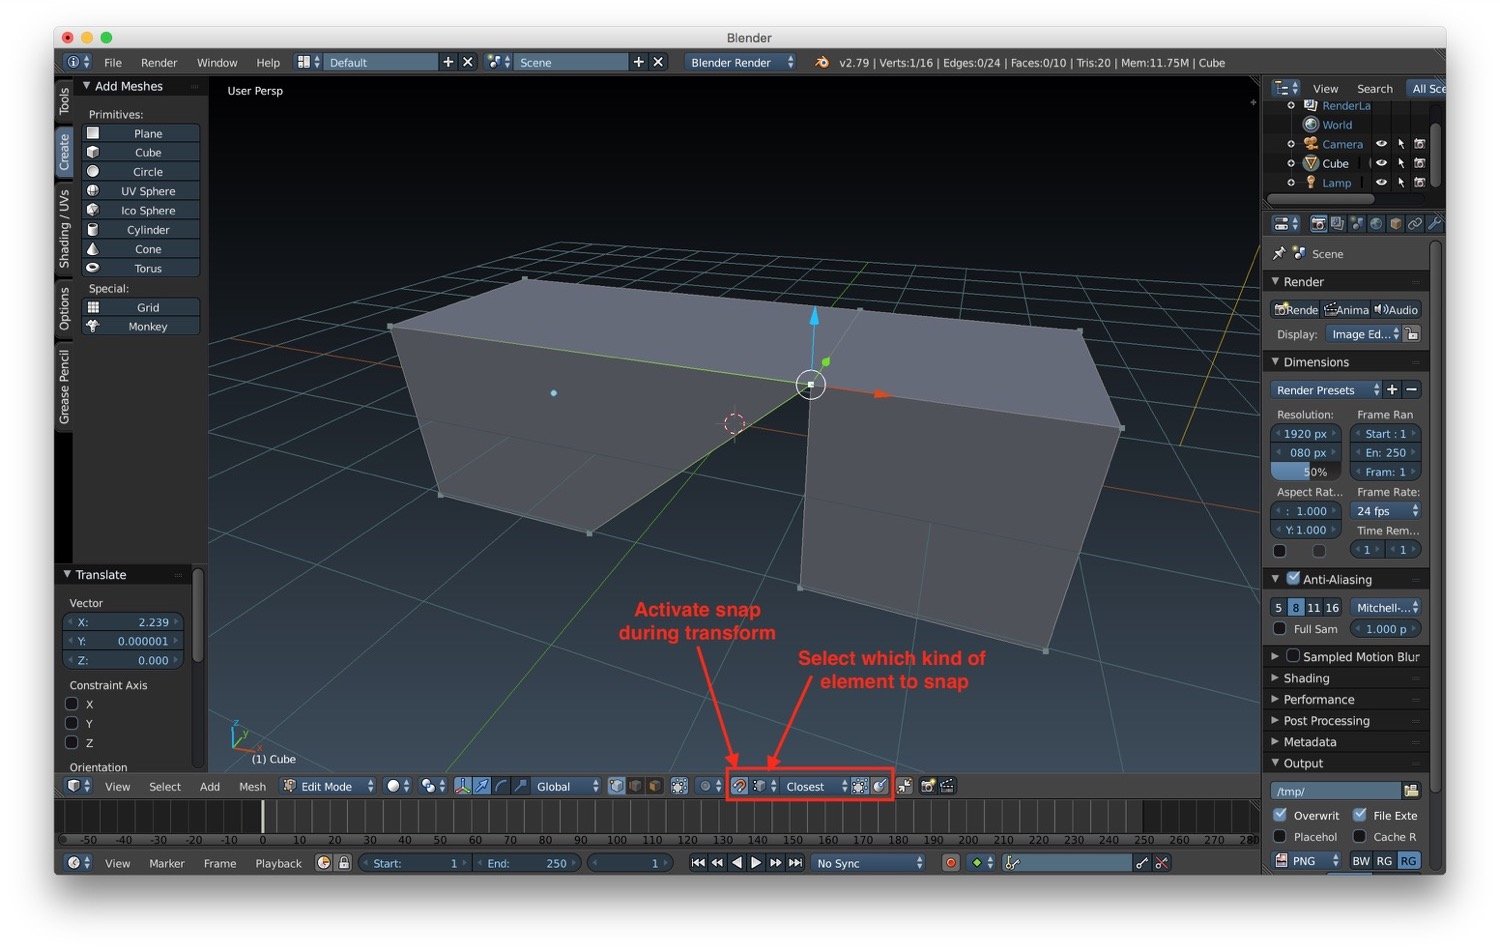
After joining two or more meshes, we will need to fill the gap between then. We can do that by using the merge tool, the remove double tool and the snap element tool to stitch the vertices that are on the border of the meshes. The vertices must be open: they need to be without a connection on one side. So after selecting one vertex we can snap it using the snap element tool. We can activate it using the button in the bottom bar of the 3D window. After activating it we can grab the selected vertex by pressing the g key, and snap it to our target vertex.
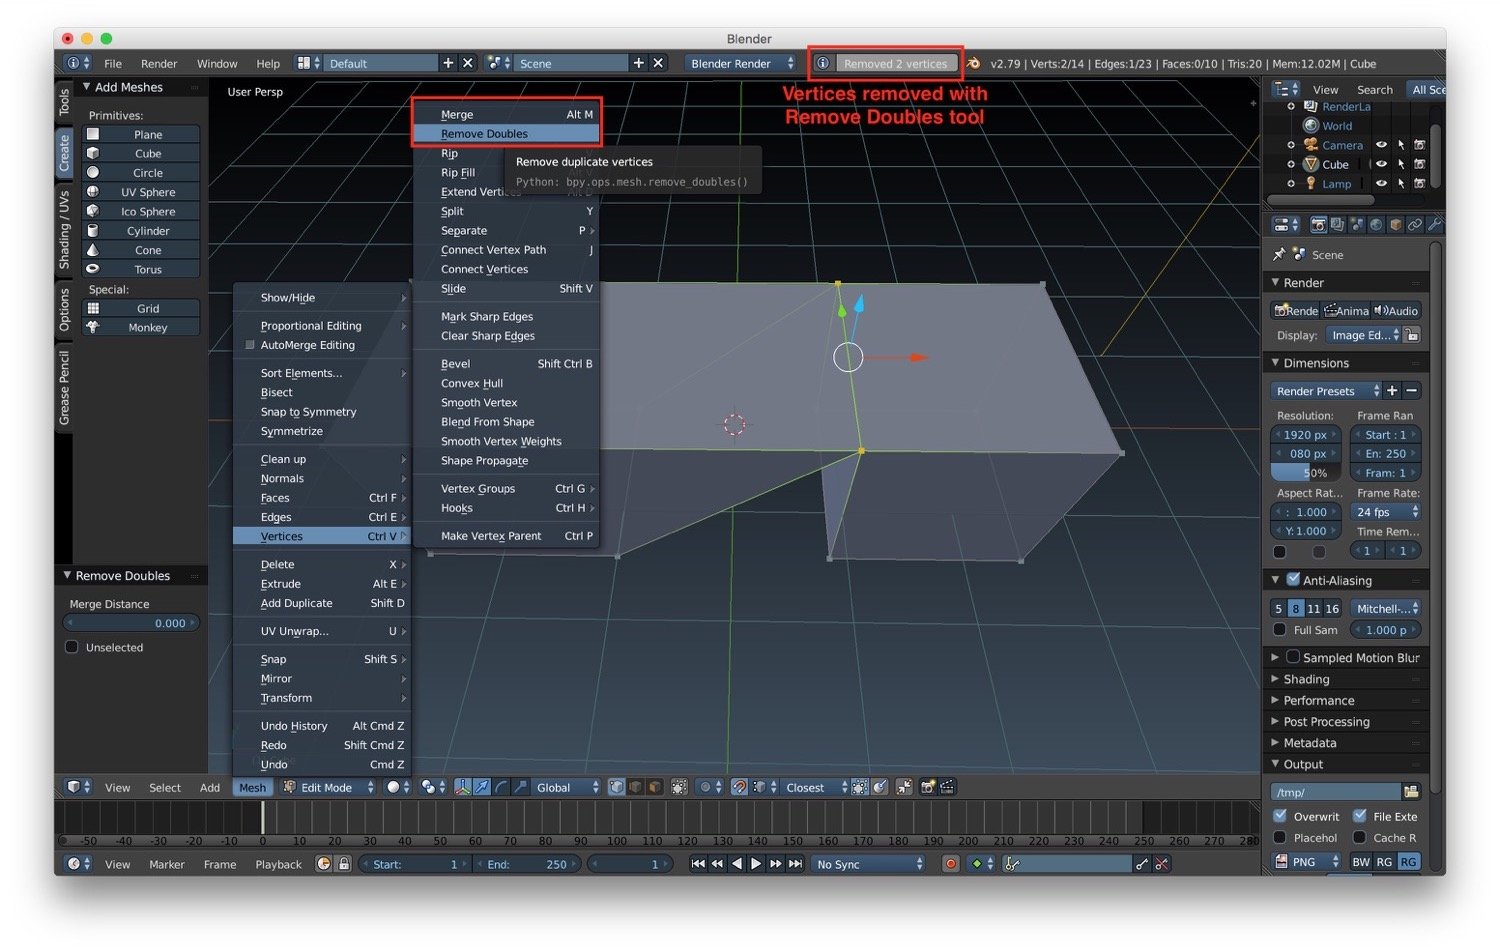
After snapping vertices we have to remove duplicates. We can do it using the merge tool or using the remove doubles tool. We can find these tools:
- under Mesh -> Type of element under selection
- from the contextual menu that you can show by using the shortcut ctrl + v key for vertices (NB.: there are also contextual menus for faces and edges that we can show using ctrl + f key and ctrl + e key)
If we decide to go with the remove doubles tools, after applying the operation a popup at the top of the 3D window will appear that will tell us the number of duplicated vertices removed.
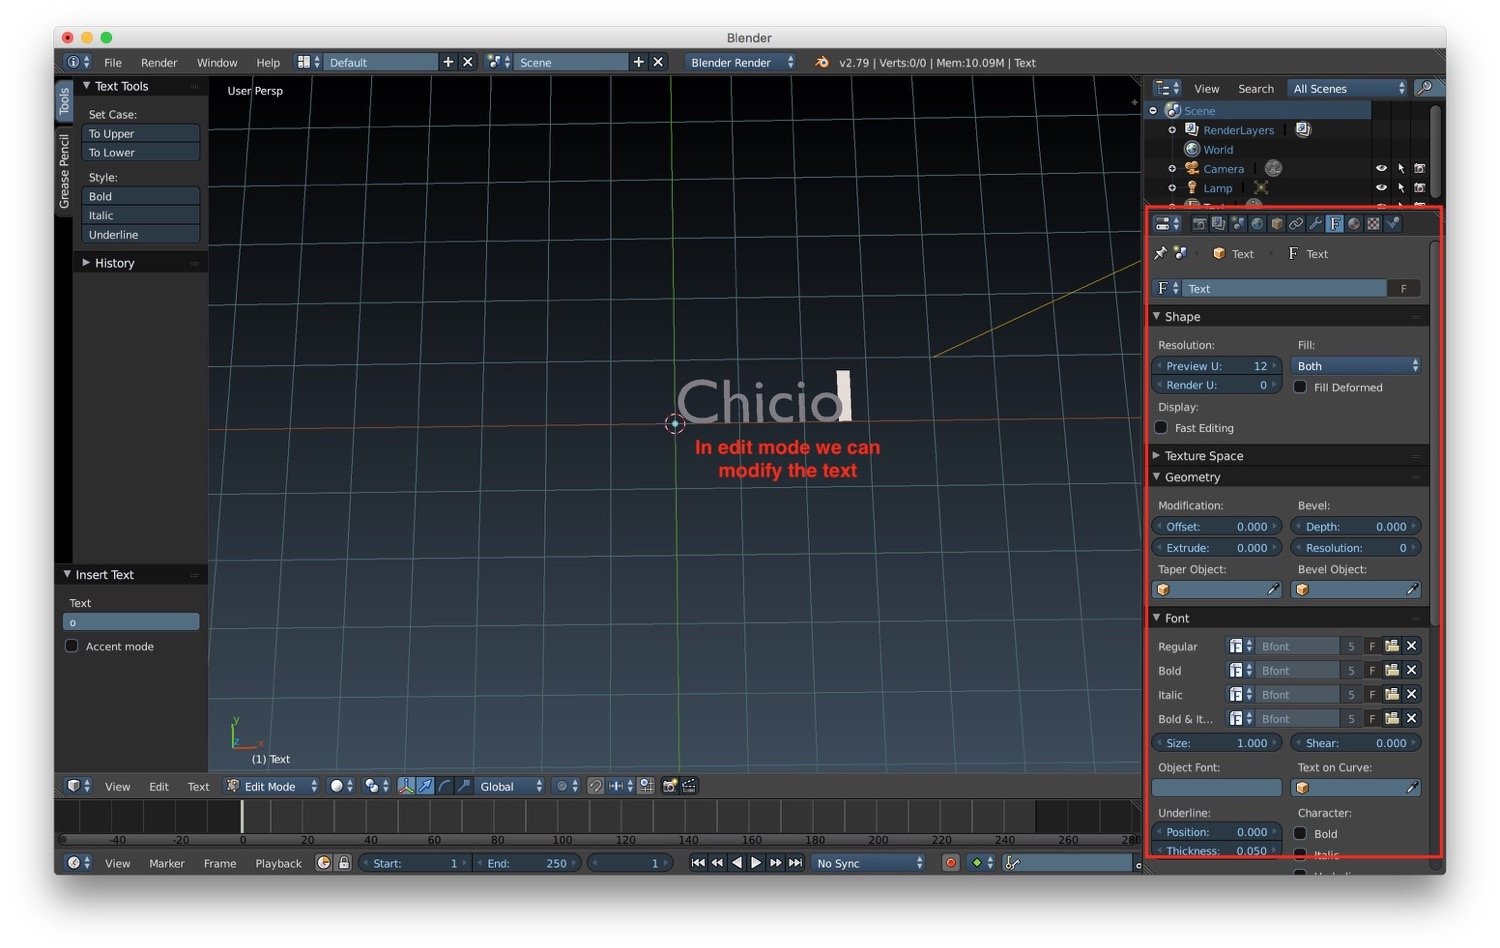
In blender it is possible to model also text. We can add text by selecting Add -> Text. We can modify the text by selecting the edit mode: a text cursor will appear so that we can modify the text. In the property panel a special tab will let as customize the text property.

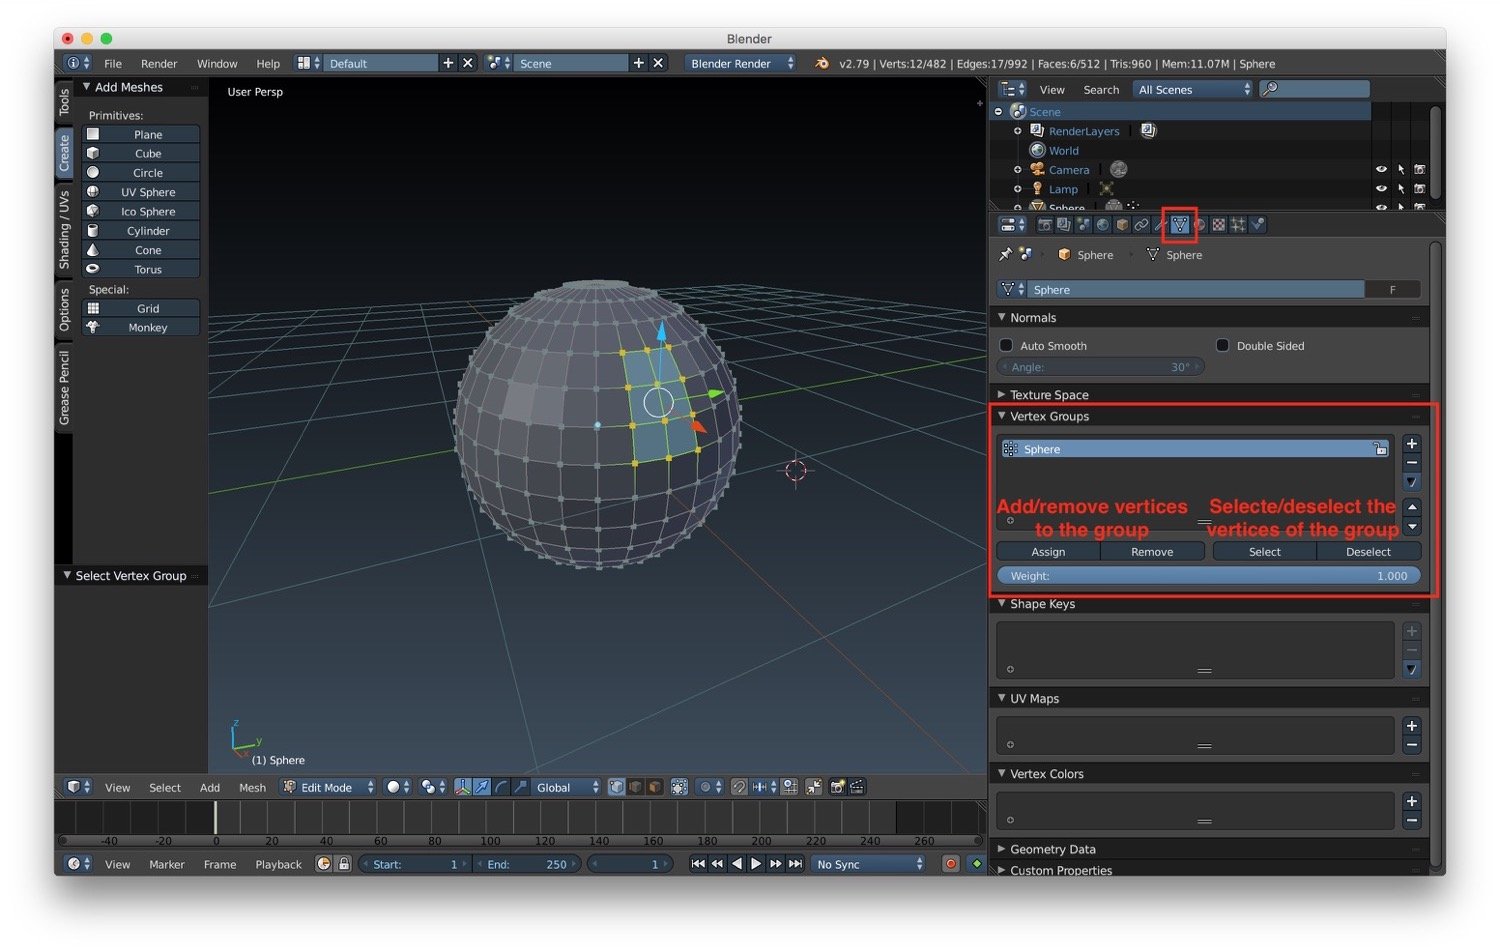
Last but not least is the vertex groups tool. This tool allows us to save selection of vertices so that we are able to select them later. We can create a vertex group in the property panel in the corresponding tab. In this tab we have buttons to:
- add/remove vertices to a group
- select/deselect the vertices of a group
In the next post we will discuss about outliner, layers, groups, hierarchies and scenes.