·
You can now publish your progressive web apps to the Google Play Store using Trusted Web Activities without writing a single line of Java/Kotlin code.
A few months ago I transformed my blog into a Progressive Web App.
As you may already know PWA let your websites behaves like a native mobile app but there's one thing that was still
missing: the possibility to publish on the App Stores. Because even if a PWA as the advantage to be searchable as a
standard website, this days user are used to search for apps on the App Stores for each platform. Well, starting from
February 2019 this problem has been solved on the Android platform with the release
of Trusted Web Activities.
In this post I will show you how I released the PWA of my blog to the Google Play Store using Trusted Web Activities (
and also without writing a single line of Java/Kotlin code 😏).
Let's start from the definition of Trusted Web Activity (TWA) taken from the official Google developer website .
There are a few things that make Trusted Web Activities (TWA) different from other ways to integrate web content with your app:
- Content in a Trusted Web activity is trusted -- the app and the site it opens are expected to come from the same developer. (This is verified using Digital Asset Links.)
- Trusted Web activities come from the web: they're rendered by the user's browser, in exactly the same way as a user would see it in their browser except they are run fullscreen. Web content should be accessible and useful in the browser first.
- Browsers are also updated independent of Android and your app -- Chrome, for example, is available back to Android Jelly Bean. That saves on APK size and ensures you can use a modern web runtime. (Note that since Lollipop, WebView has also been updated independent of Android, but there are a significant number of pre-Lollipop Android users.)
- The host app doesn't have direct access to web content in a Trusted Web activity or any other kind of web state, like cookies and localStorage. Nevertheless, you can coordinate with the web content by passing data to and from the page in URLs (e.g. through query parameters, custom HTTP headers, and intent URIs.)
- Transitions between web and native content are between activities. Each activity (i.e. screen) of your app is either completely provided by the web, or by an Android activity
So as you can read above, a Trusted Web Activity let you integrate web content that you personally own into your app and let you execute it into the most modern web runtime (e.g. Chrome) available on the device of the user. Really cool!!! : heart_eyes:
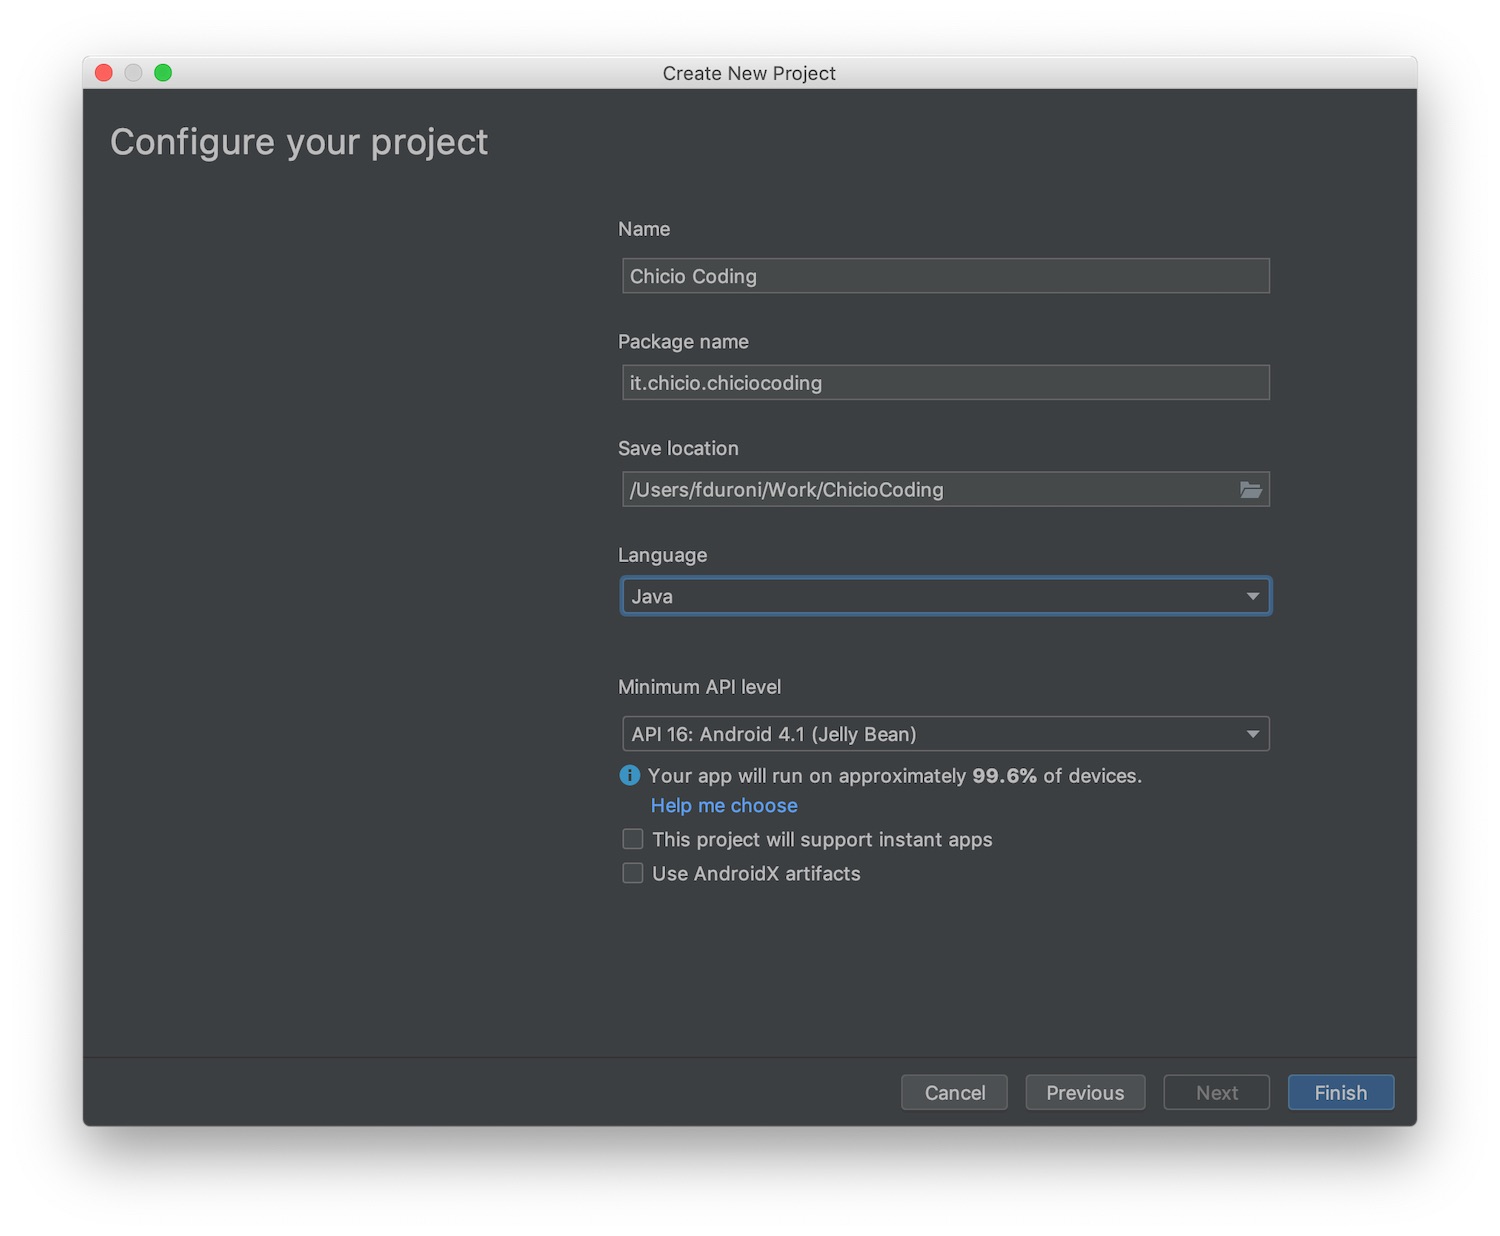
Let's start to see the real action: how I publish my blog PWA to the Google Play Store using TWA. First of all, I created a nw android project. This was a standard Android project with minimum API level 16. This let me cover the 99.6% of the Android user base. I chose to create an empty project without any activity/fragment in it.
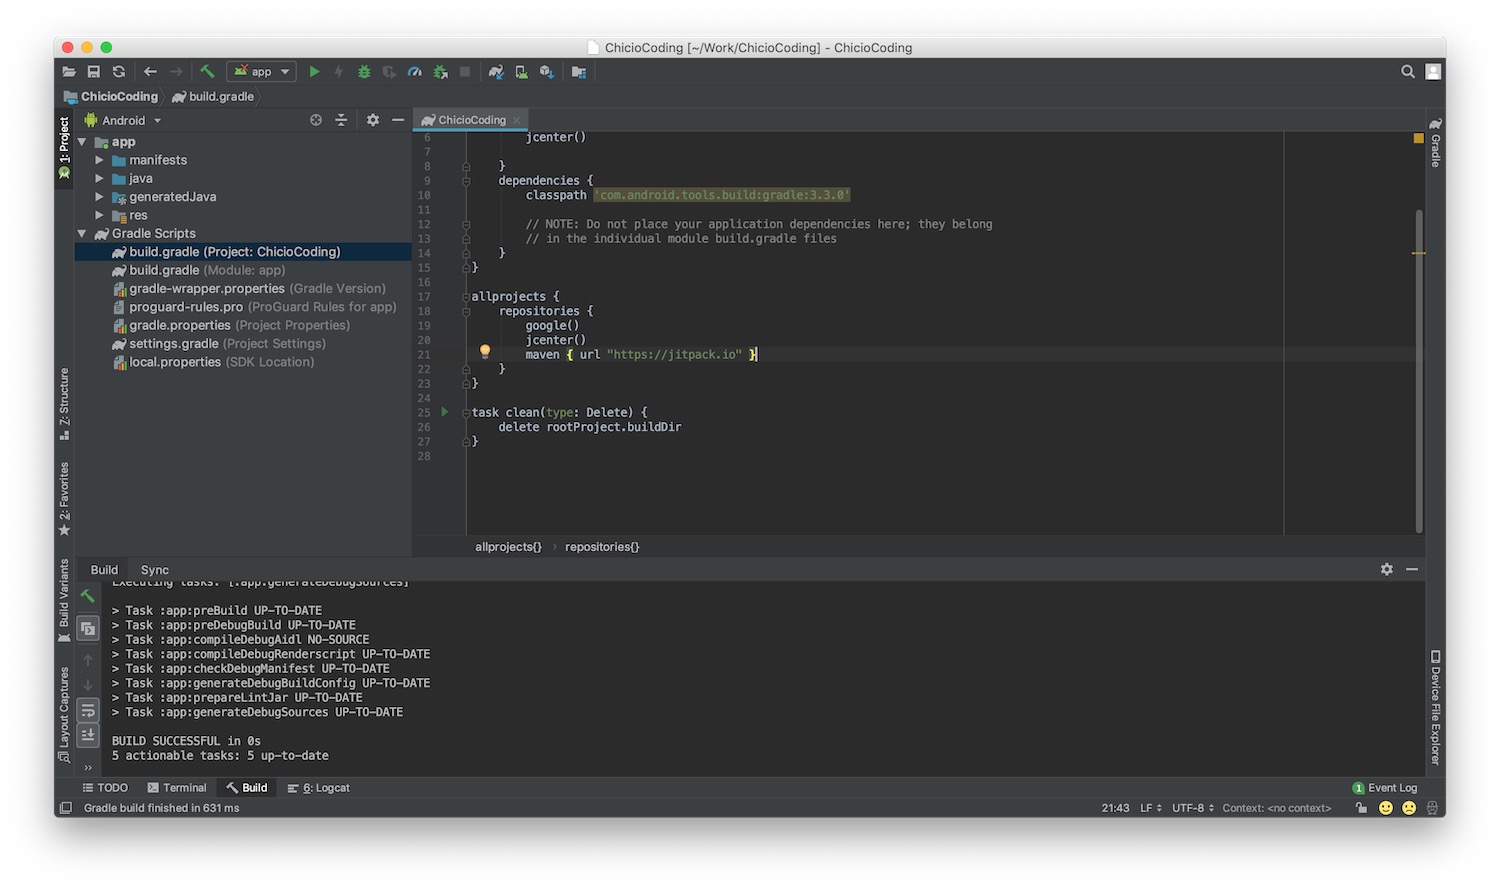
Then I added the TWA support as a dependency of the app. The TWA implementation is contained inside the custom tabs client library published on Jitpack (because unfortunately at the moment of this writing the custom tabs client library contained inside Jetpack doesn't have the TWA support). So I added Jitpack as repository to the project level gradle file. Then I added the custom tabs client library as dependency inside the module gradle file. This last dependency points to the custom tabs client library published on github and exposed through Jitpack. I had to specify a specific commit hash in order to be sure that the library version downloaded contains the TWA support. Precisely, I added the following line of code to the gradle file.
implementation 'com.github.GoogleChrome.custom-tabs-client:customtabs:7a2c1374a3'

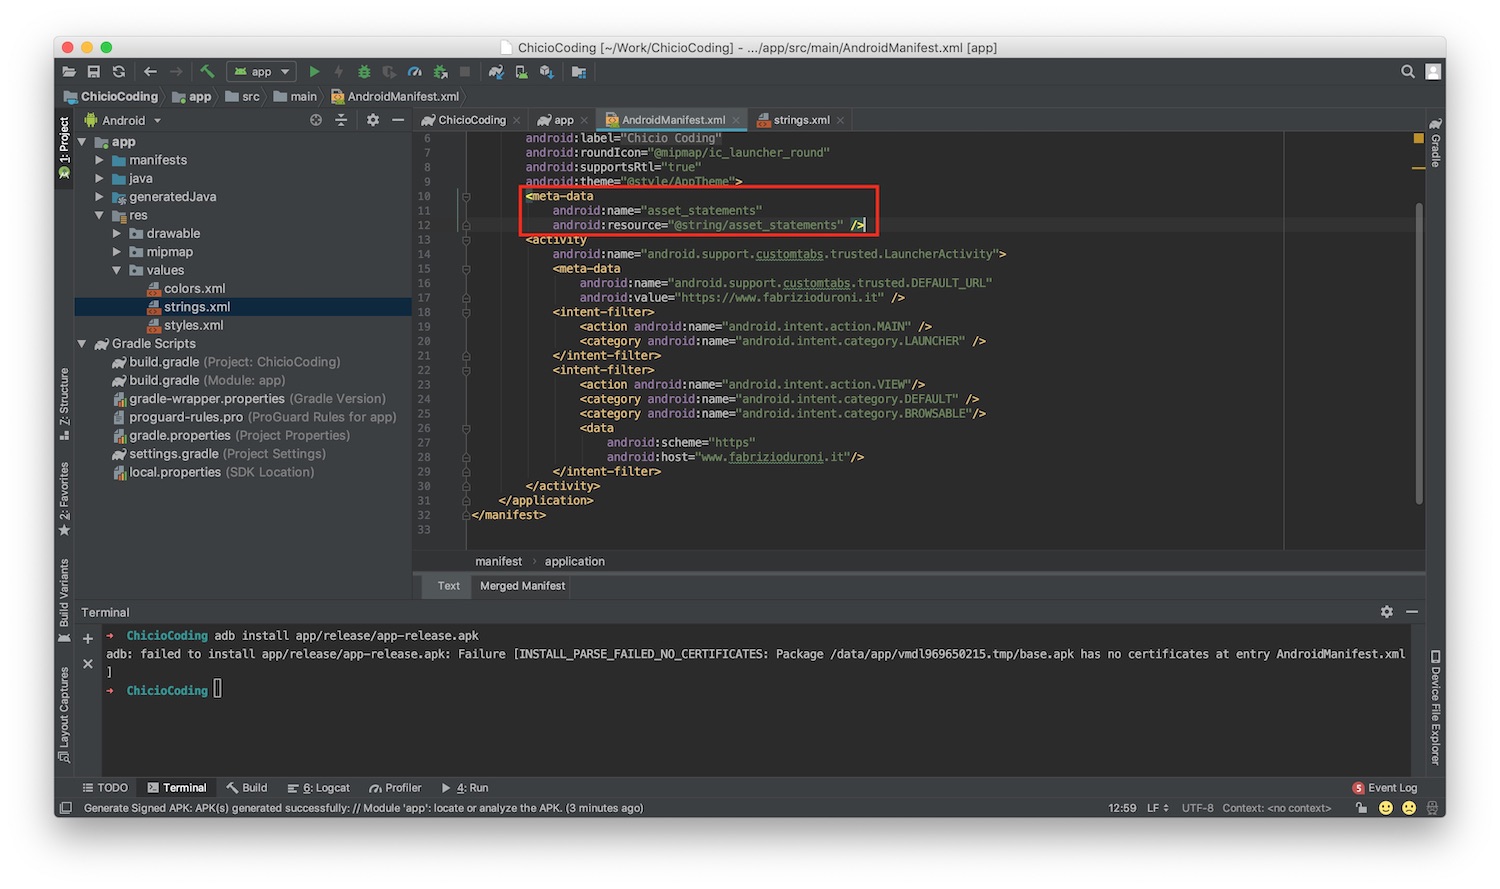
After the dependencies setup I added the TWA Activity. To do this I just had to modify the Android app manifest file by declaring a new TWA activity inside it. For the readers that are not mobile developer, the Android app manifest is a file contained in all the Android apps. Its main function is to present essential information about the application to the Android system including:
The declaration of the TWA inside the Android app manifest must include some important information:
meta-data tag that must contain the url to be opened by the TWAintent-filter that adds the TWA to the Android Launcherintent-filter that allows the TWA to intercept Android Intents that open the url you want to open in the
TWA. The android:host attribute inside the data tag must point to the domain being opened by the TWA and specified
in the meta-data tag.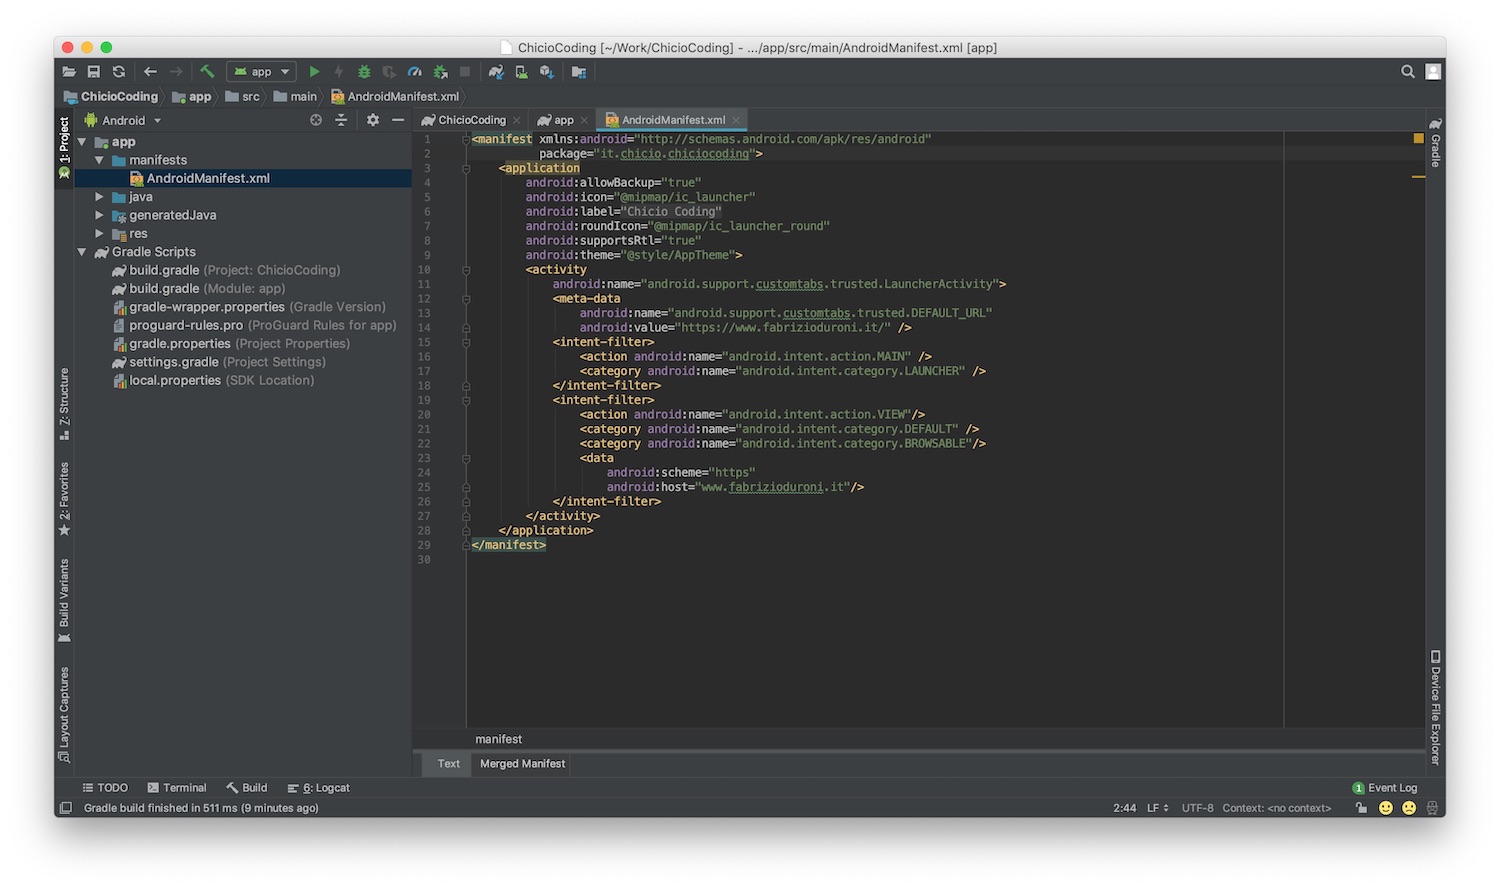
Now I had to establish the link between our PWA website and our PWA app. This is a two way operation because I had to:
This associations removes automatically the url address bar from the TWA activity. In this way the Android app will be
full screen as a standard one (and as a PWA in standalone mode 😏).
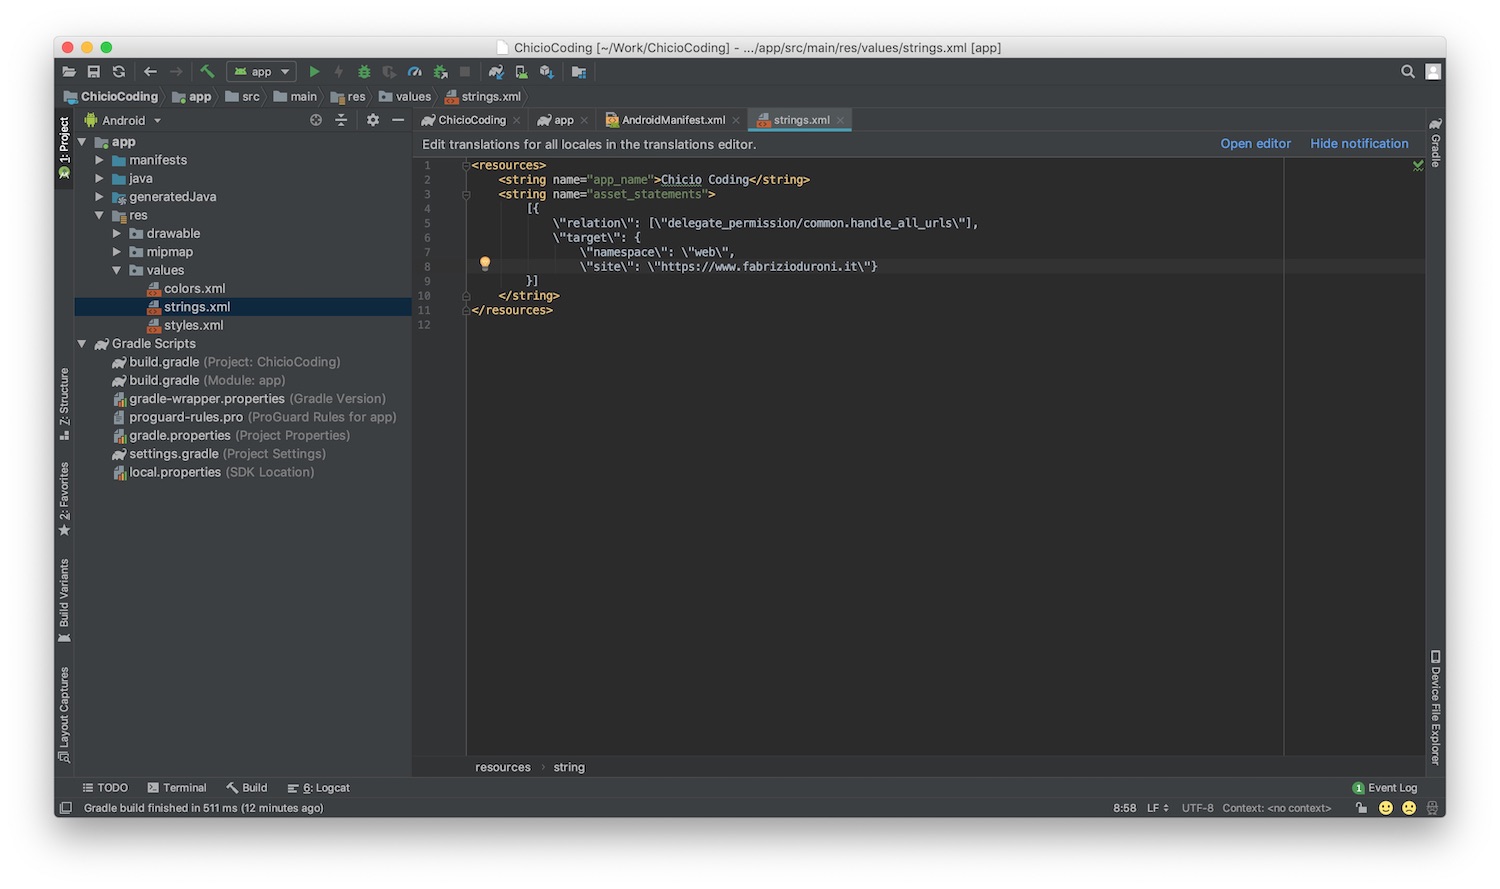
Let's start from the first association, from the app to the web site. To do this I created a new string resource inside
the strings.xml file. This new string resource contains the Digital AssetLink statement that you can see below.
<resources>
    <string name="app_name">Chicio Coding</string>
    <string name="asset_statements">
        [{
        \"relation\": [\"delegate_permission/common.handle_all_urls\"],
        \"target\": {
        \"namespace\": \"web\",
        \"site\": \"https://www.fabrizioduroni.it\"}
        }]
    </string>
</resources>
Then I linked this string resource statement inside the Android app manifest by adding a new meta-data tag as a child
of the application tag (NOT inside the TWA declaration).
It is possible to test that the association from app to the website has been completed. To do this I had to:
chrome://flags, search for an item called Enable command line on
non-rooted devices and change it to ENABLED and then restart the browser.adb) to run the following command:adb shell "echo '_ --disable-digital-asset-link-verification-for-url=\"https://www.fabrizioduroni.it\"' > /data/local/tmp/chrome-command-line"
After this debug setup the app is launched without the address bar 😌.
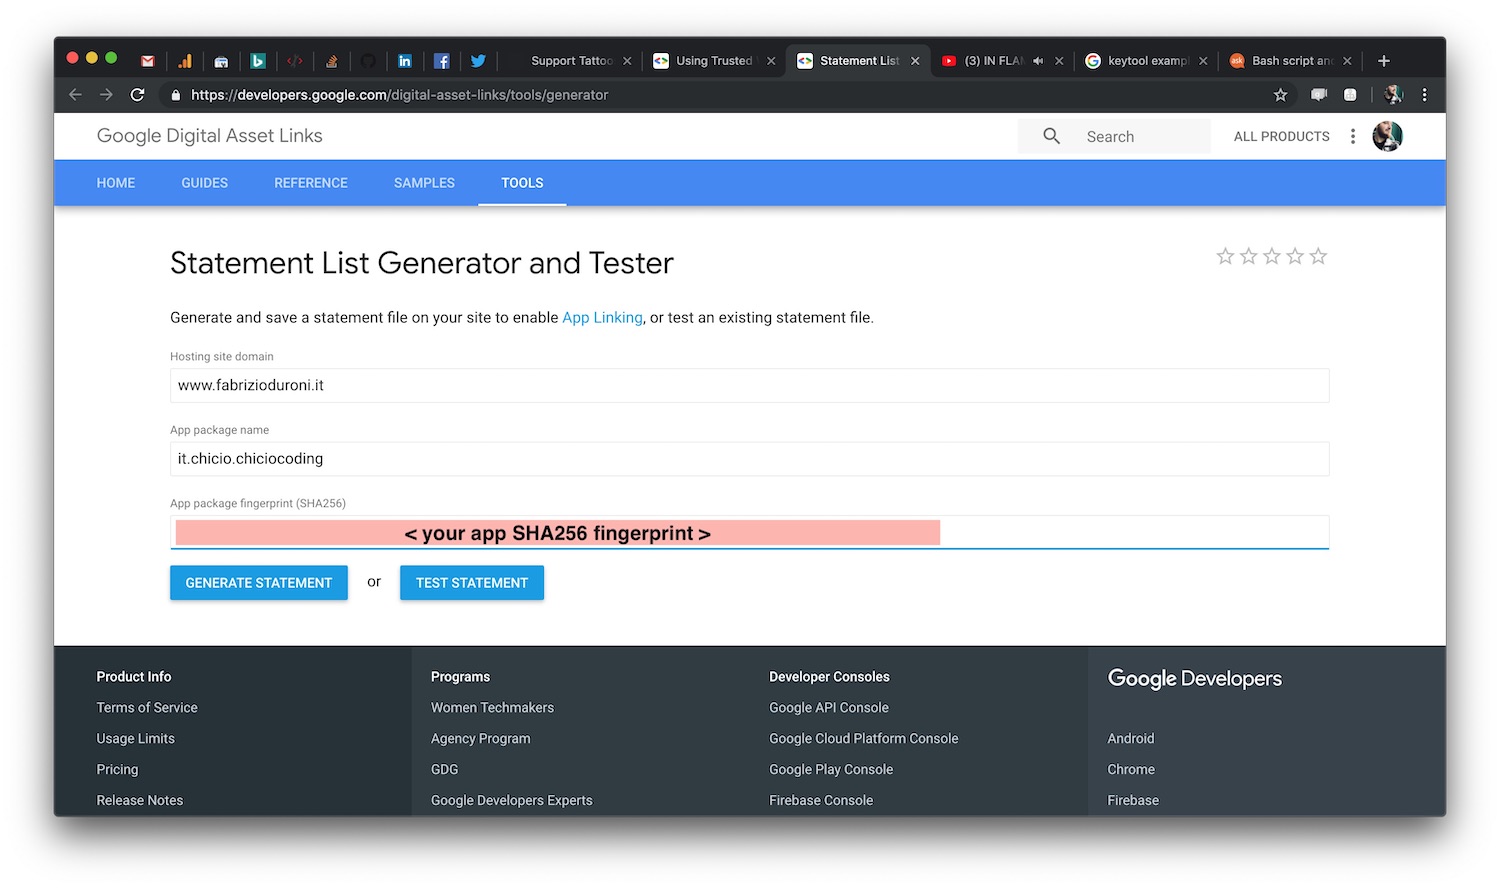
Now I need to finish the development by establishing an association from the website to the app. To do that I needed 2
information about my app:
The first one was easy to get. I just needed to open the Android manifest file and get it. The second piece of information I needed is inside the keystore that contains the release signing key used to publish the app on the Google Play store. So the first operation I did was to generate a new release signing key. You can find the standard procedure to get one in this page. The key created was contained inside a keystore file. So in order to be able to extract the SHA-256 fingerprint from the keystore that contains my release signing key I used keytool. You can find the exact command I used below. The value for the SHA-256 fingerprint is printed under the Certificate fingerprints section.
keytool -list -v -keystore <your keystore jks file> -alias <your alias> -storepass <your store psw> -keypass <your key psw>
With both pieces of information at hand I was able to generate a web assetlink.json statement using
the asset links generator. The assetlink.json
generated must be served from the PWA domain from the URL <your PWA domain>/.well-known/assetlinks.json.
After publishing the assetlink.json to my PWA domain my app was ready to be published to the store. So I followed the
standard
procedure to upload an app to the Google Play Store. If
the two ways association fails, it is possible to check for error messages using the the Android Debug Bridge, by
launching from the terminal the following command with the test device connected (or the emulator running).
adb logcat | grep -e OriginVerifier -e digital_asset_links
Now my blog PWA is published to Google Play store. Below you can find a video that shows you the installation from the Google Play store and the first open of the app. In the video you can also see the debug messages related to the digital asset links verification.
Go and download it immediately 💘!!!!

