
·
In this new post of the series Blender tutorial I will talk about materials.
In the previous post of the series "Blender tutorial"
we talked about the outliner, layers, groups and hierarchies in Blender. In this post we will start to add some details
to our models by learning how to use materials.
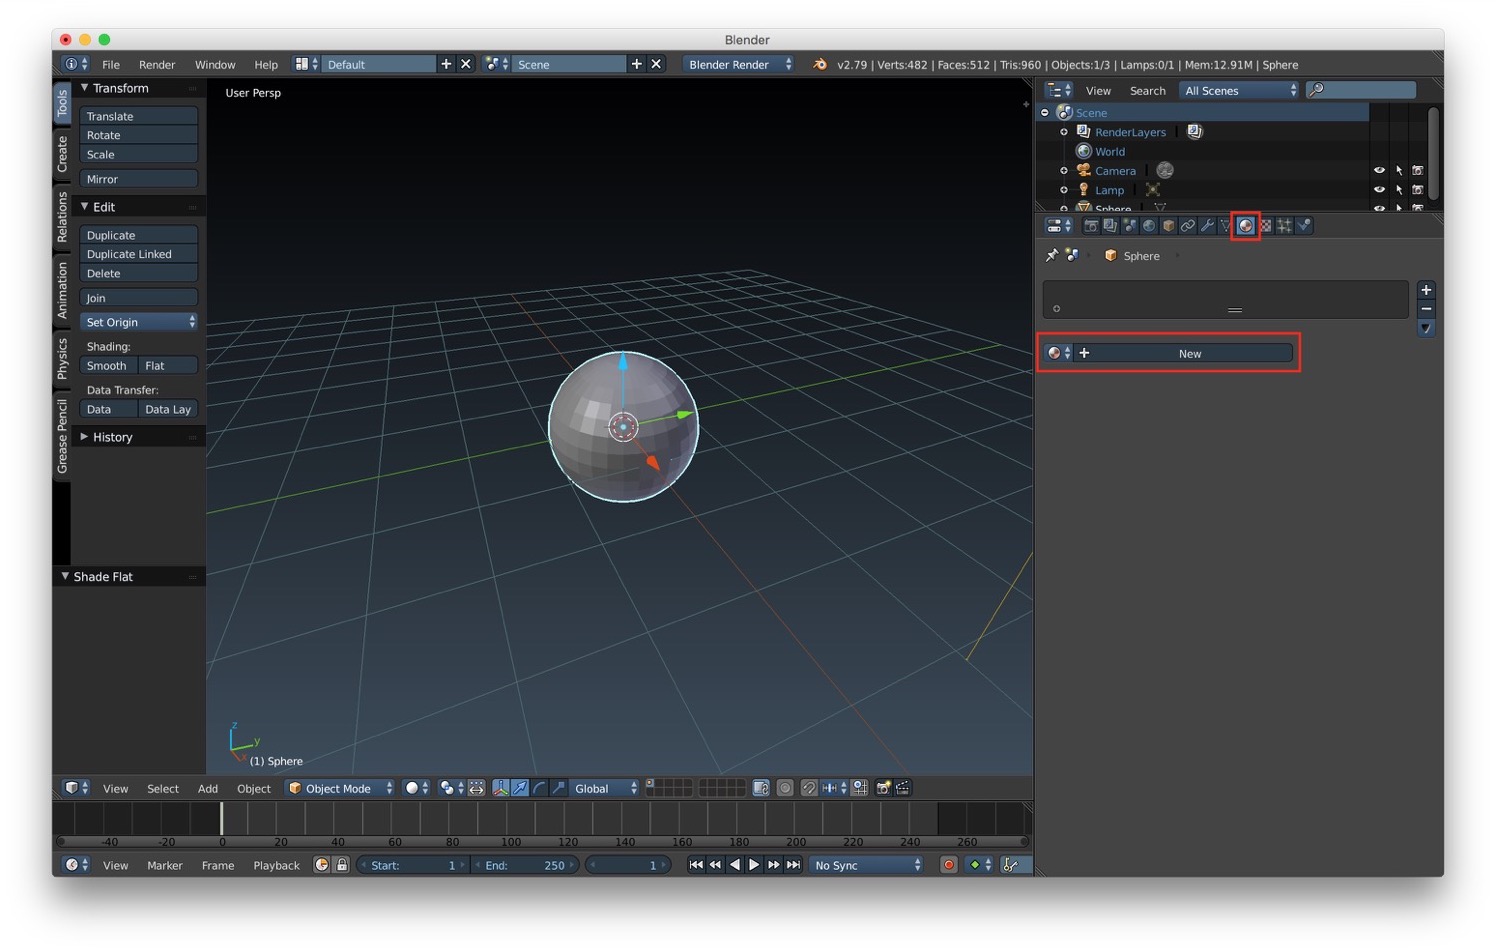
To set a material on an object we can select the material tab from the properties panel, and the press the new button.
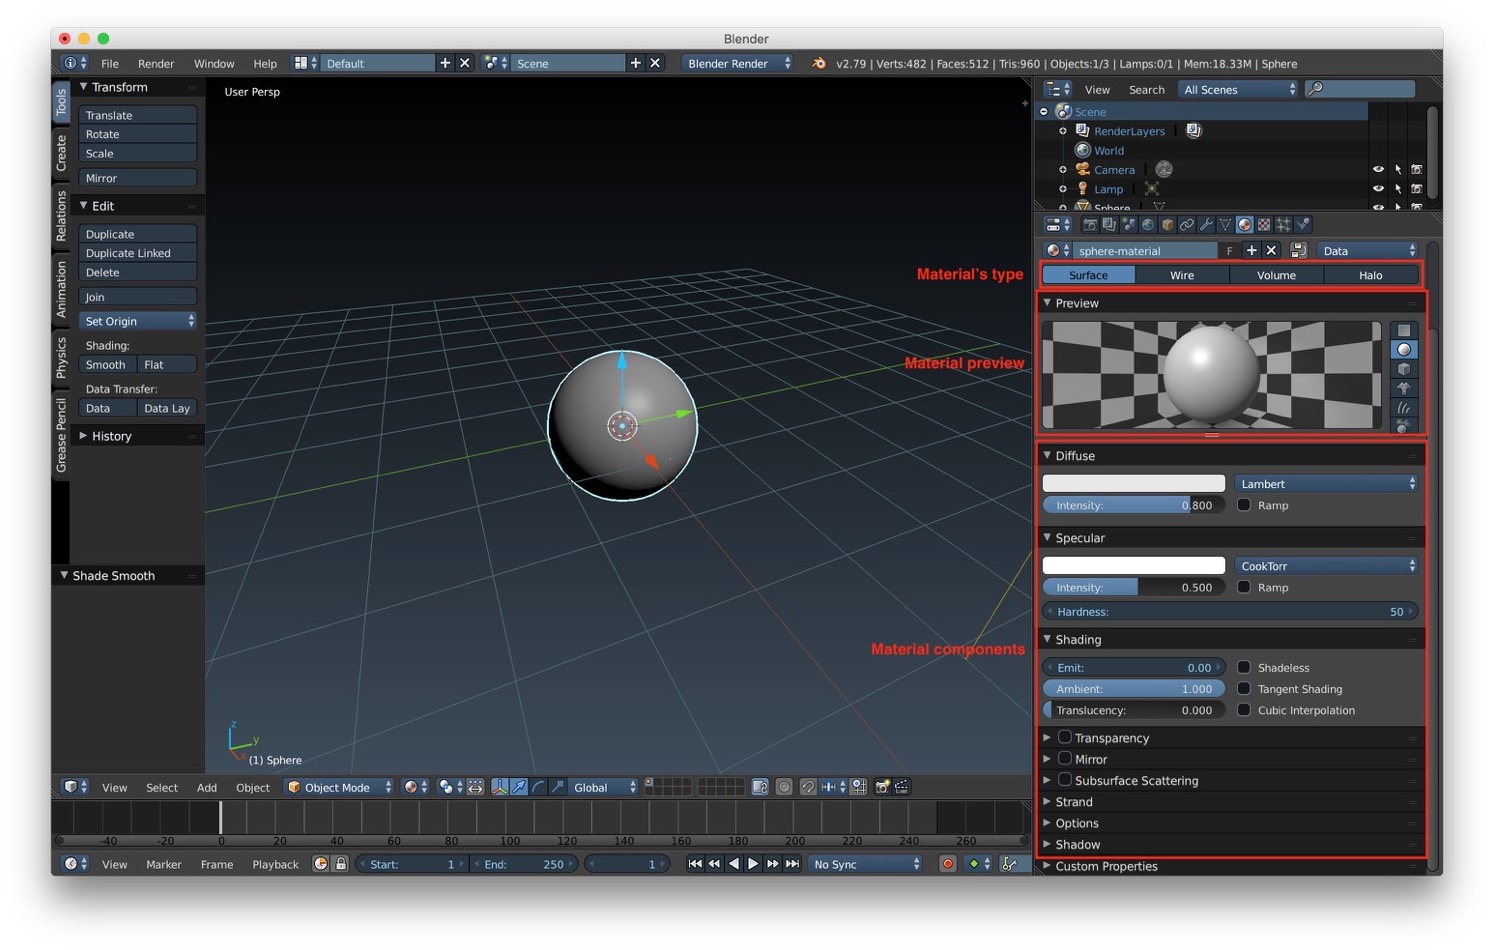
After creating we material a new list of option to customize it appears. We have the possibility to change the material's name. We can select the material type. The available options are:
Most of the time (9/10 times) we will use the surface types. The other are for special effects we will see in the future. Then we have other options to customize the main components of the material. The definitions given below of these components are from an artist point of view. If you're interested to know the details on the computer graphics side, you can have a look at this documentation (on the web you can find plenty of resources about this topic). So the main material components are:
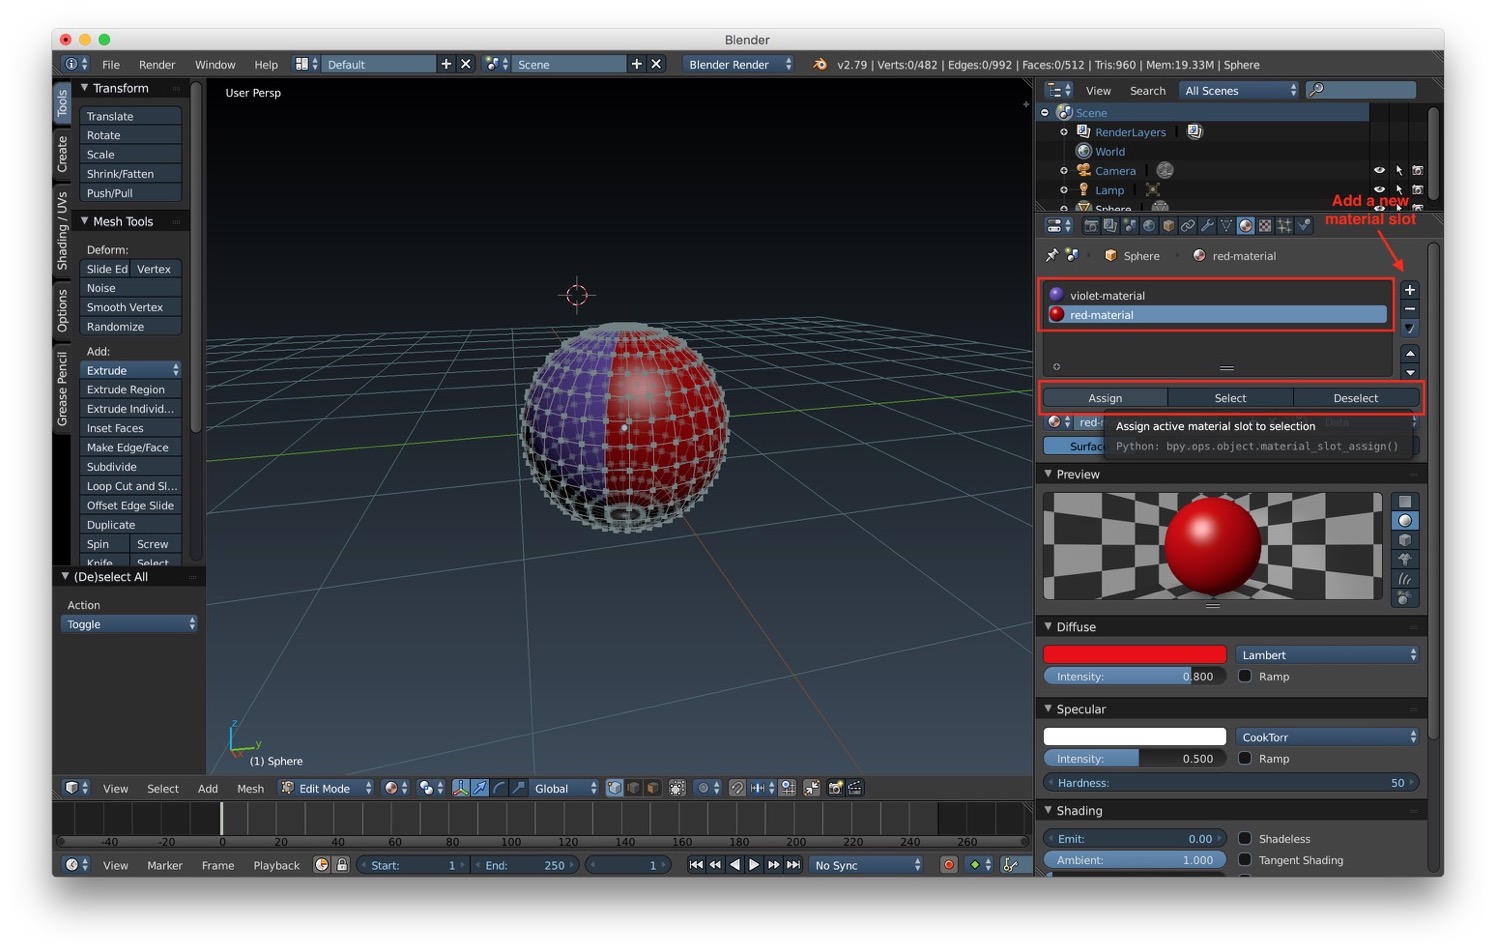
We can assign multiple material to the same objects. To do it we just need to :
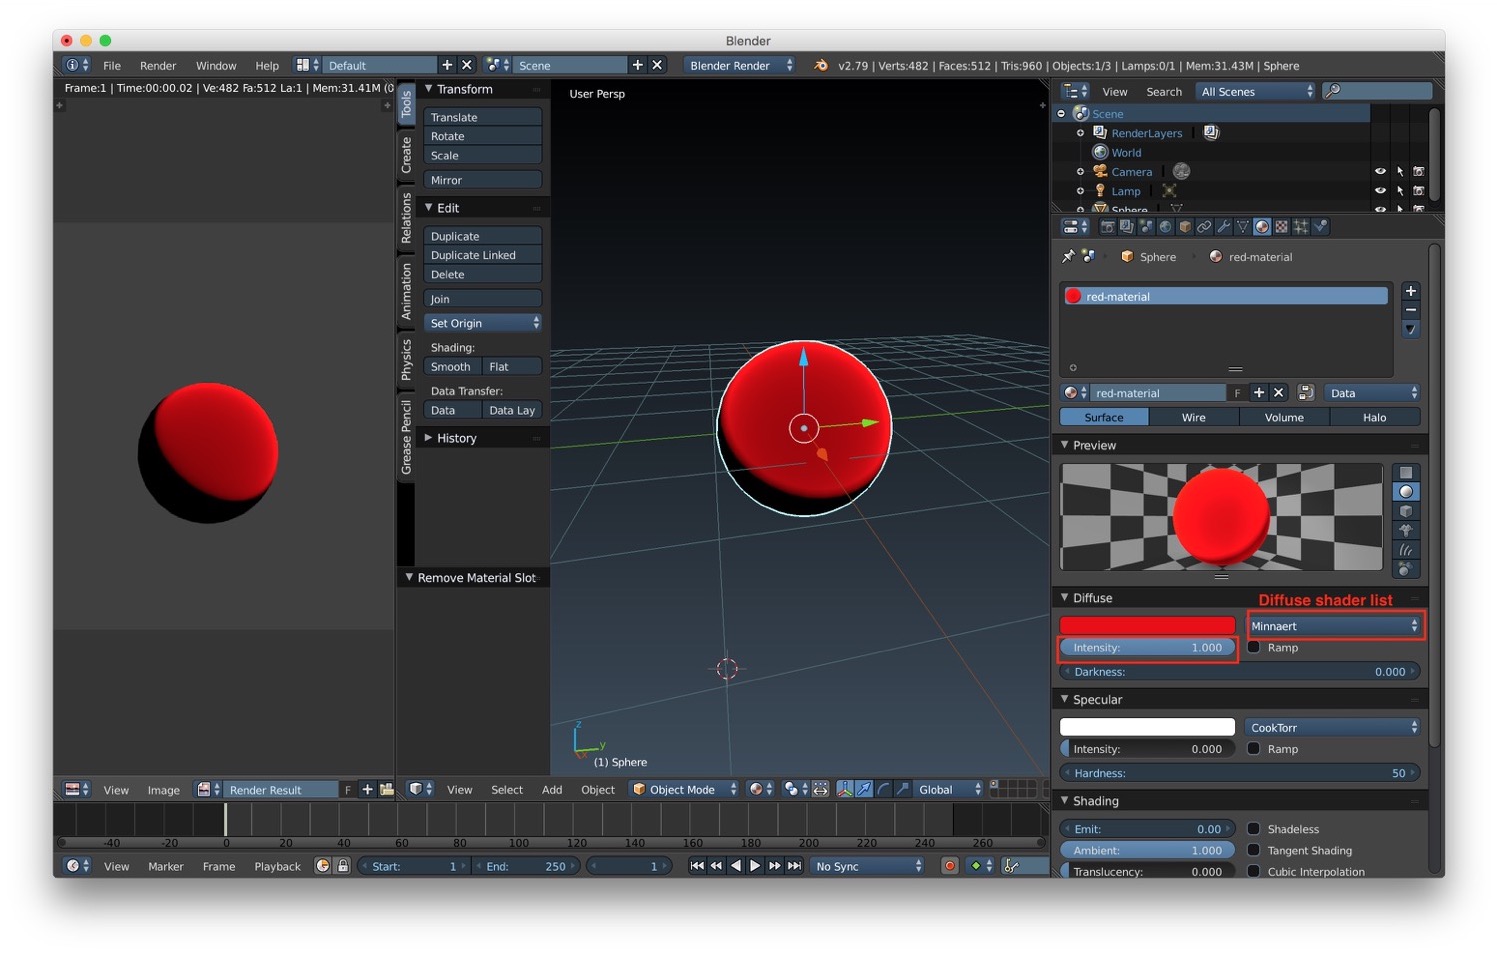
Now let's star to have a deeper look at the diffuse component. As we said before, the diffuse component defines the main color of our object. The default shader applied to it is the lambert shader. Lambertian is an ideal diffuse reflection that ideally reflect equally the light in all direction. We have also the possibility to choose one of the other shaders:
All the diffuse shader types have an intensity parameter to adjust their contribution to the final look of the objects.
After the diffuse component there's the specular component. This component is used to represent the highlights/shininess of the surface. We can select the color as for the diffuse shader. We also have again a intensity parameter to tweak the contribution of the specular component to the final material appearance. There's a list of shader we can choose from:
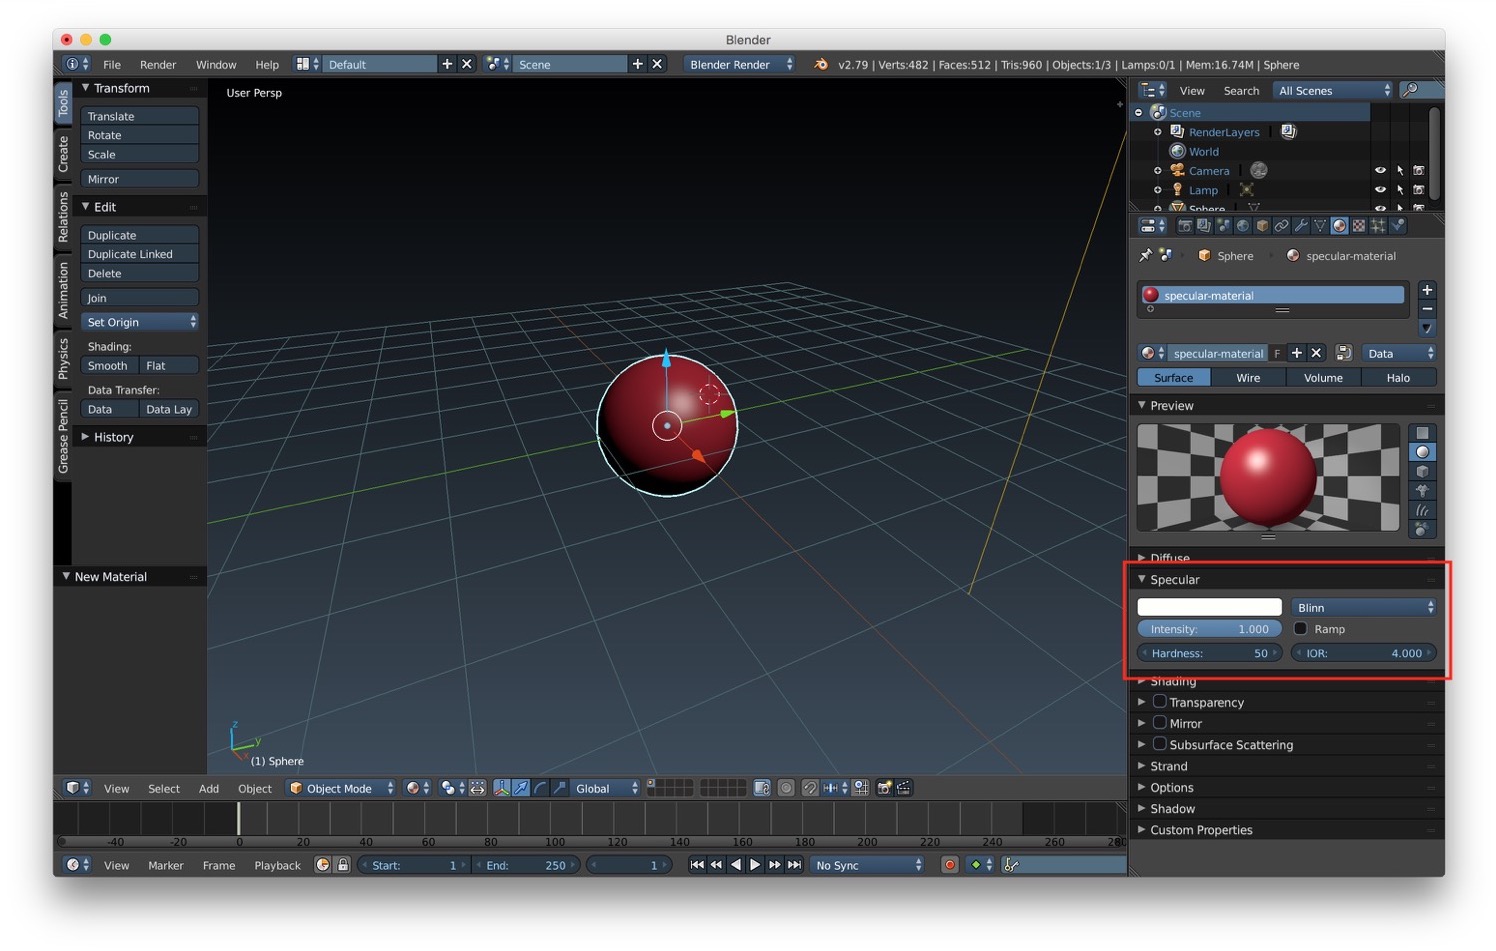
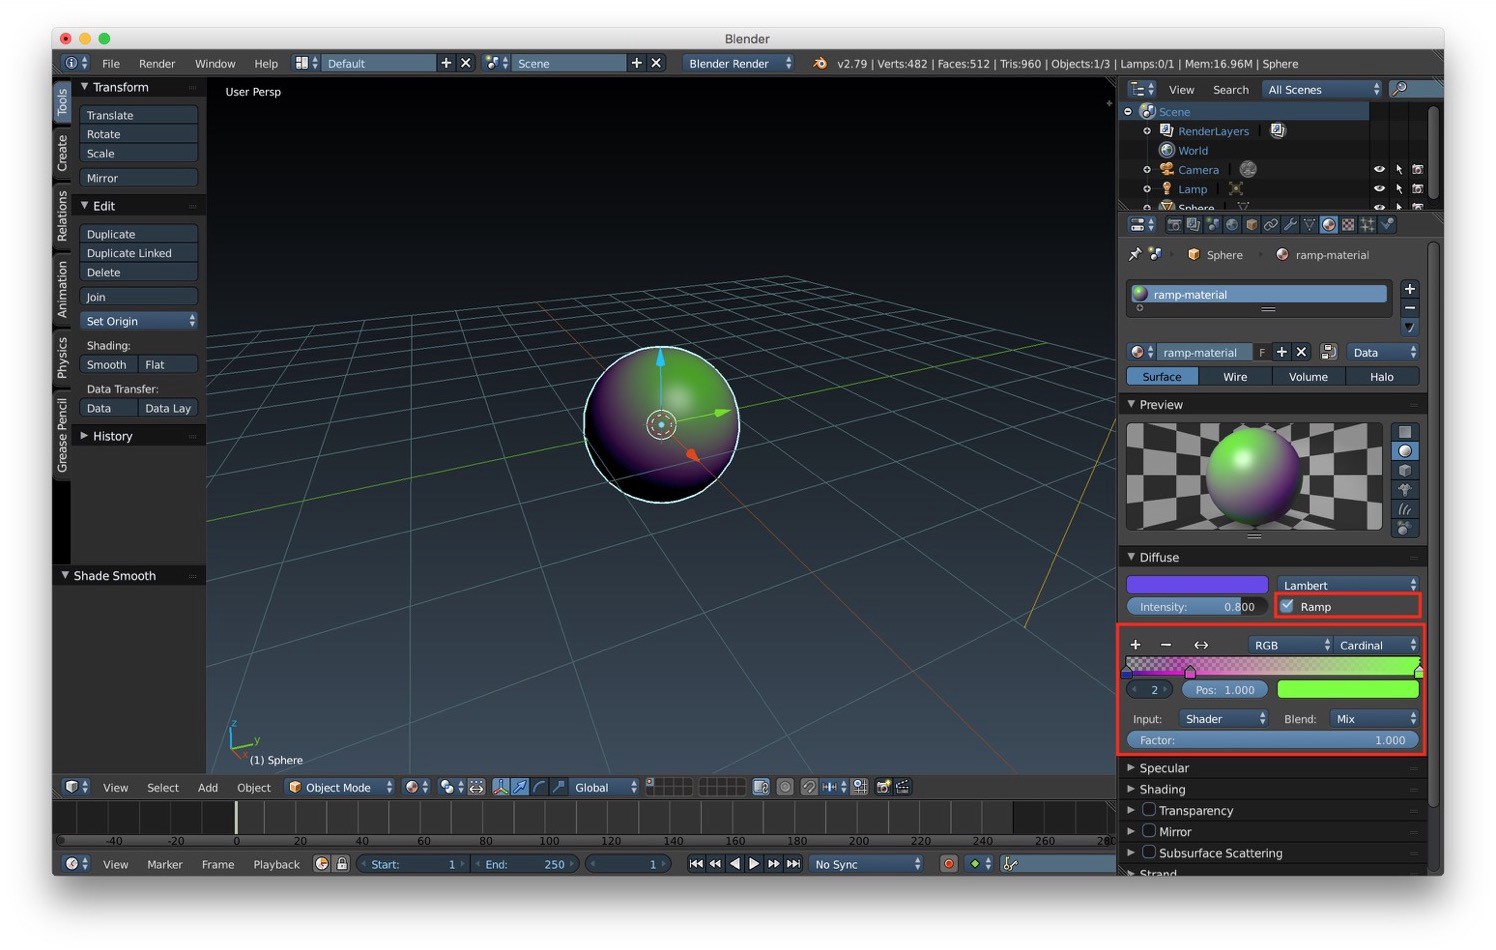
For both the diffuse and specular component we have also the ramp option. With this option it is possible to apply gradient on the surface. The ramp option could be useful to add a little bit more pop to the material final look. The starting values for ramp contains two color, but we can add as many intermediate points as we want.
We have also some shading option that we can use to set other to surface components. In particular we can set the ambient and emit components using the slider contained in this section. We can also completely turn off the shader by using the shadeless option, or using the tangent shading option to create tangent specular highlights.

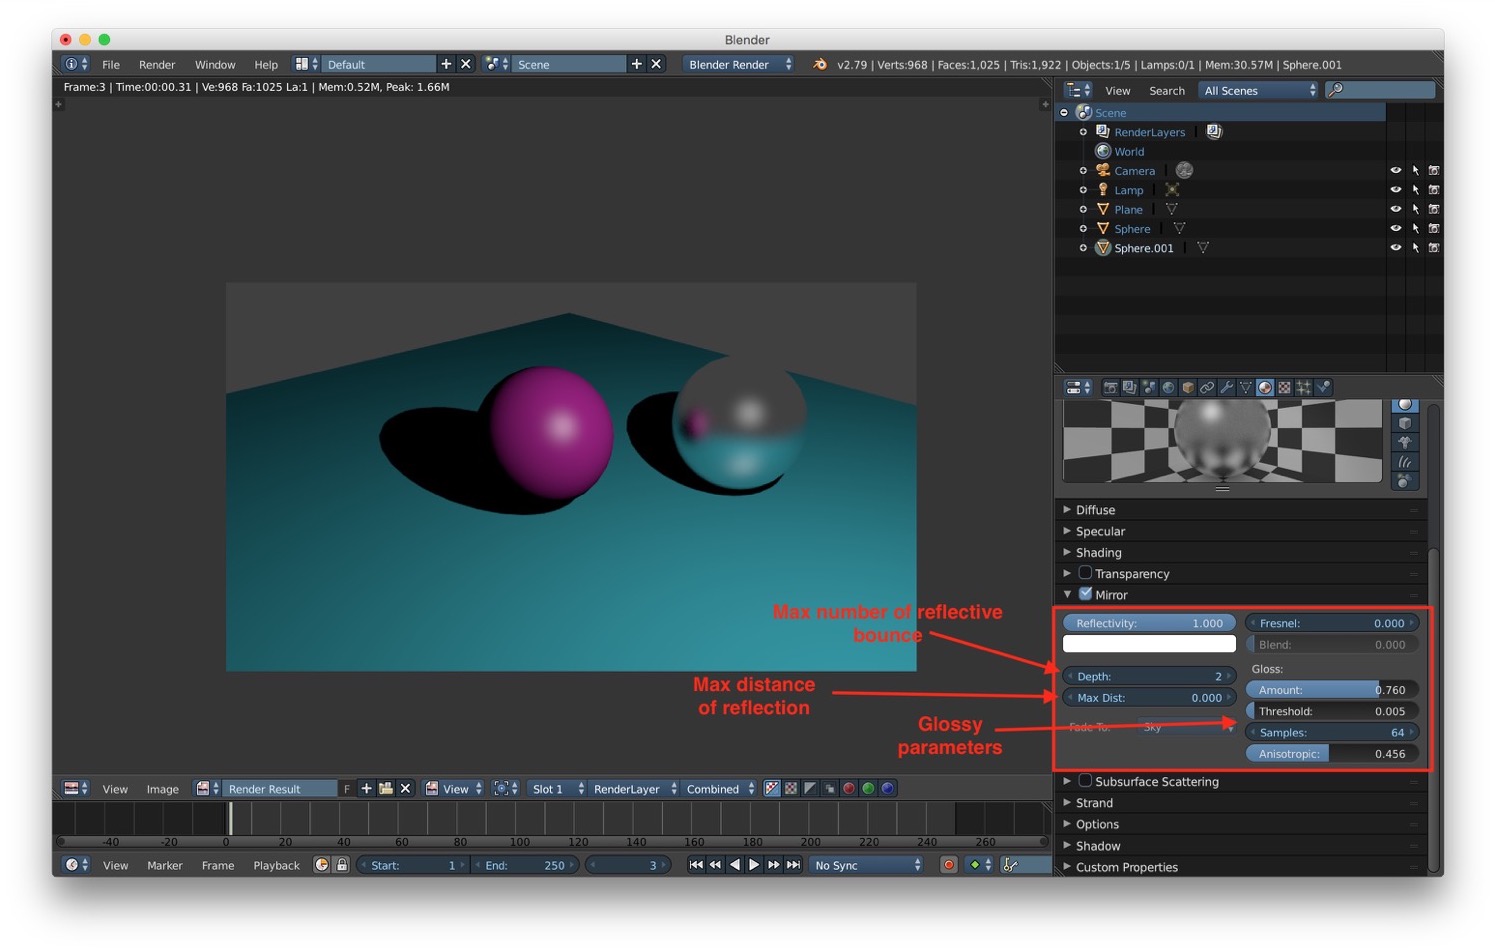
Now we will take a look at how we can create reflective material. To create a reflective material we can activate the Mirror component. We have some options to customize the final result of our reflection:
Remember that the mirror material result is visible only in the final render view.
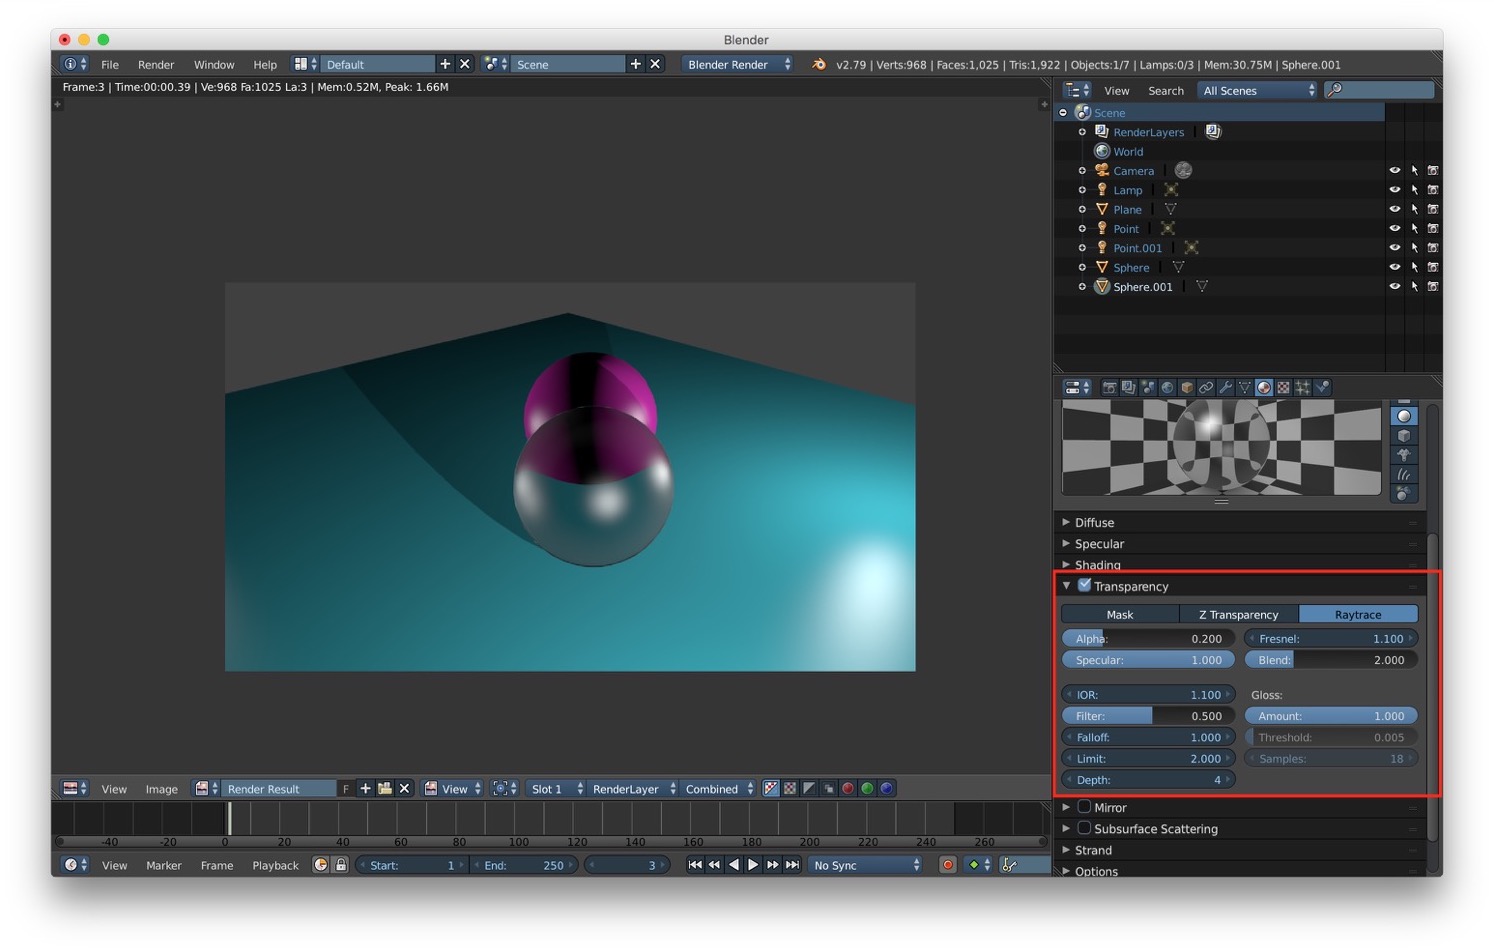
After mirror material we can take a look at the transparency component. To make a transparent material we have to activate this component. There are 3 option:
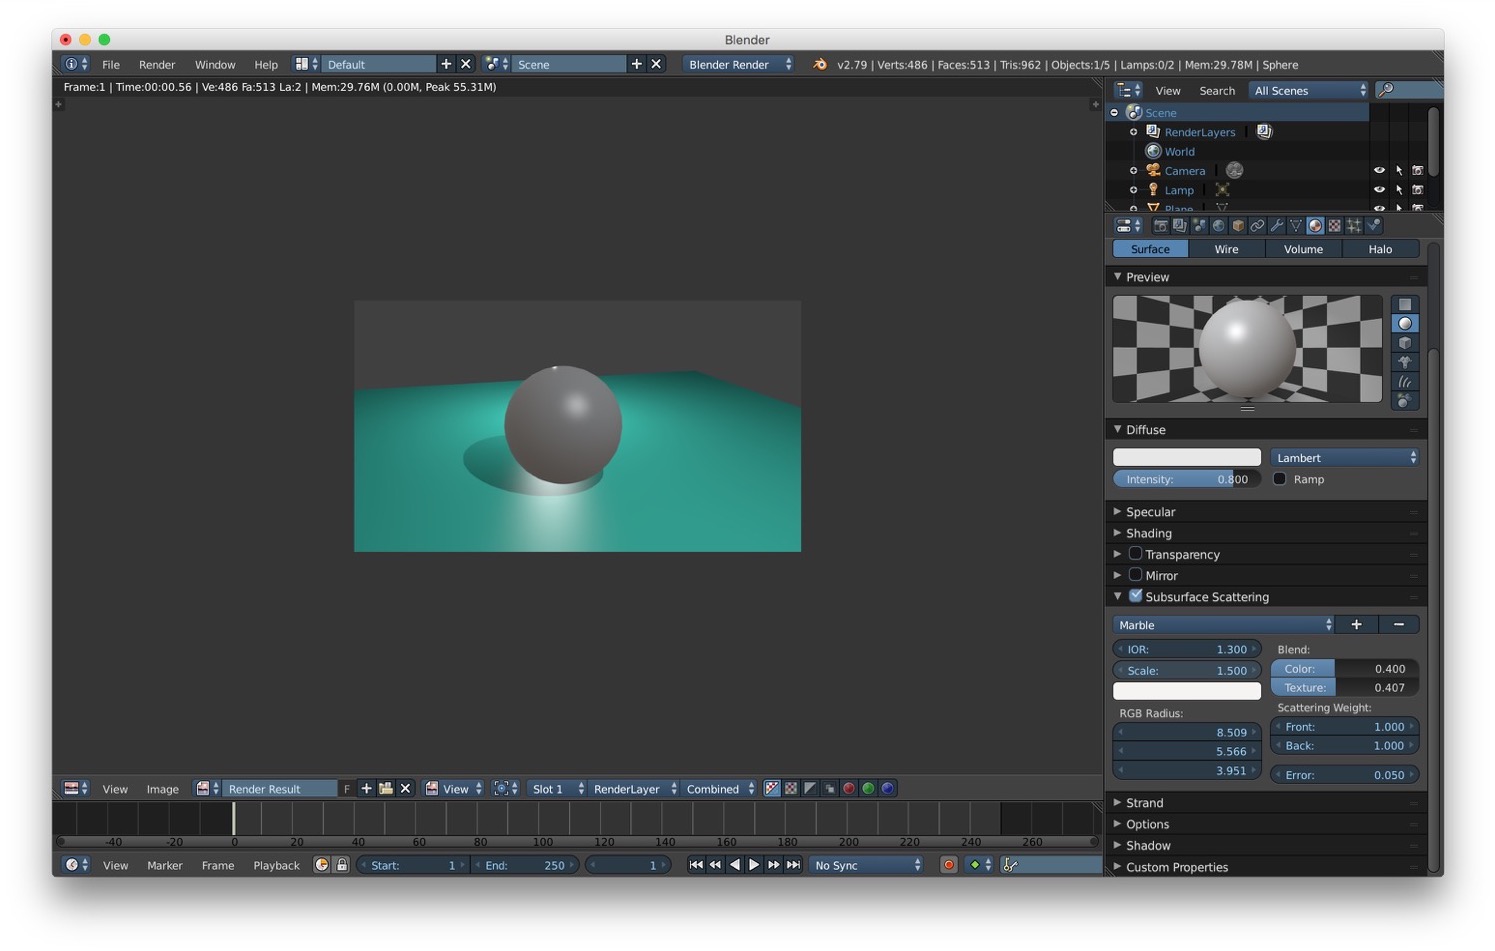
Last but not least we have subsurface scattering. As reported on wikipedia:
Subsurface scattering is a mechanism of light transport in which light penetrates the surface of a translucent object, is scattered by interacting with the material, and exits the surface at a different point
We have some parameter to modify the final result of this component:
In the next post we will talk about textures.